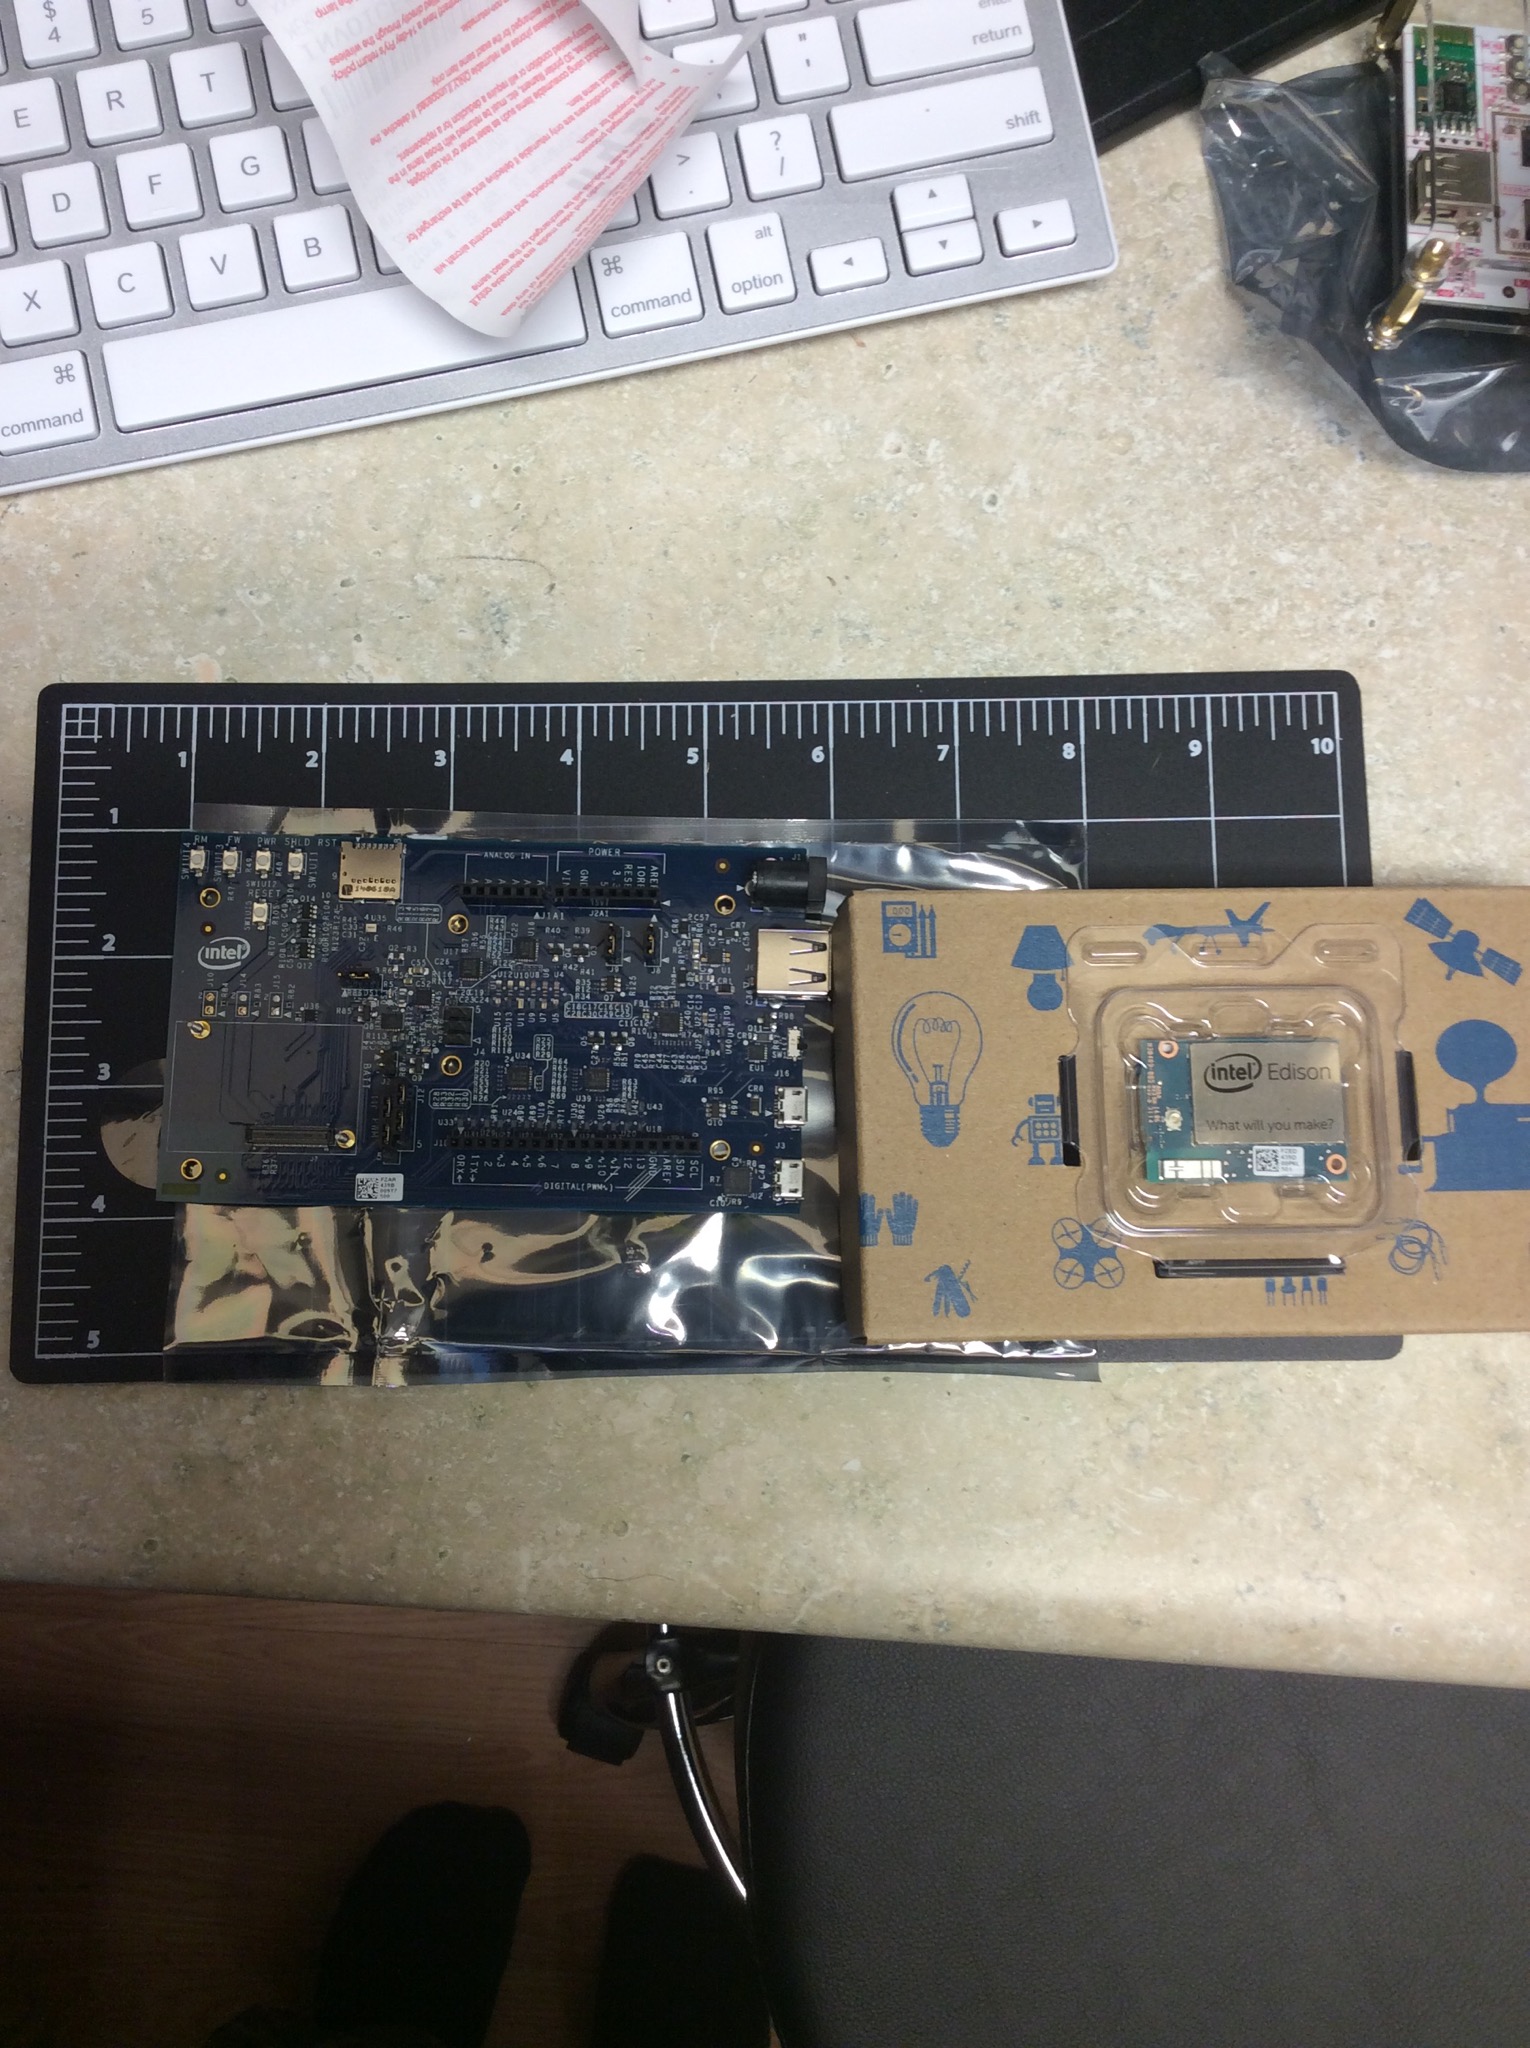
I’ve been watching the Intel Edison product line for a while. I’ve had breakout boards on backorder from Sparkfun. Found some on a shelf at my local Fry’s and could not pass it up at the price of USD$85.

software creative
I’ve been watching the Intel Edison product line for a while. I’ve had breakout boards on backorder from Sparkfun. Found some on a shelf at my local Fry’s and could not pass it up at the price of USD$85.
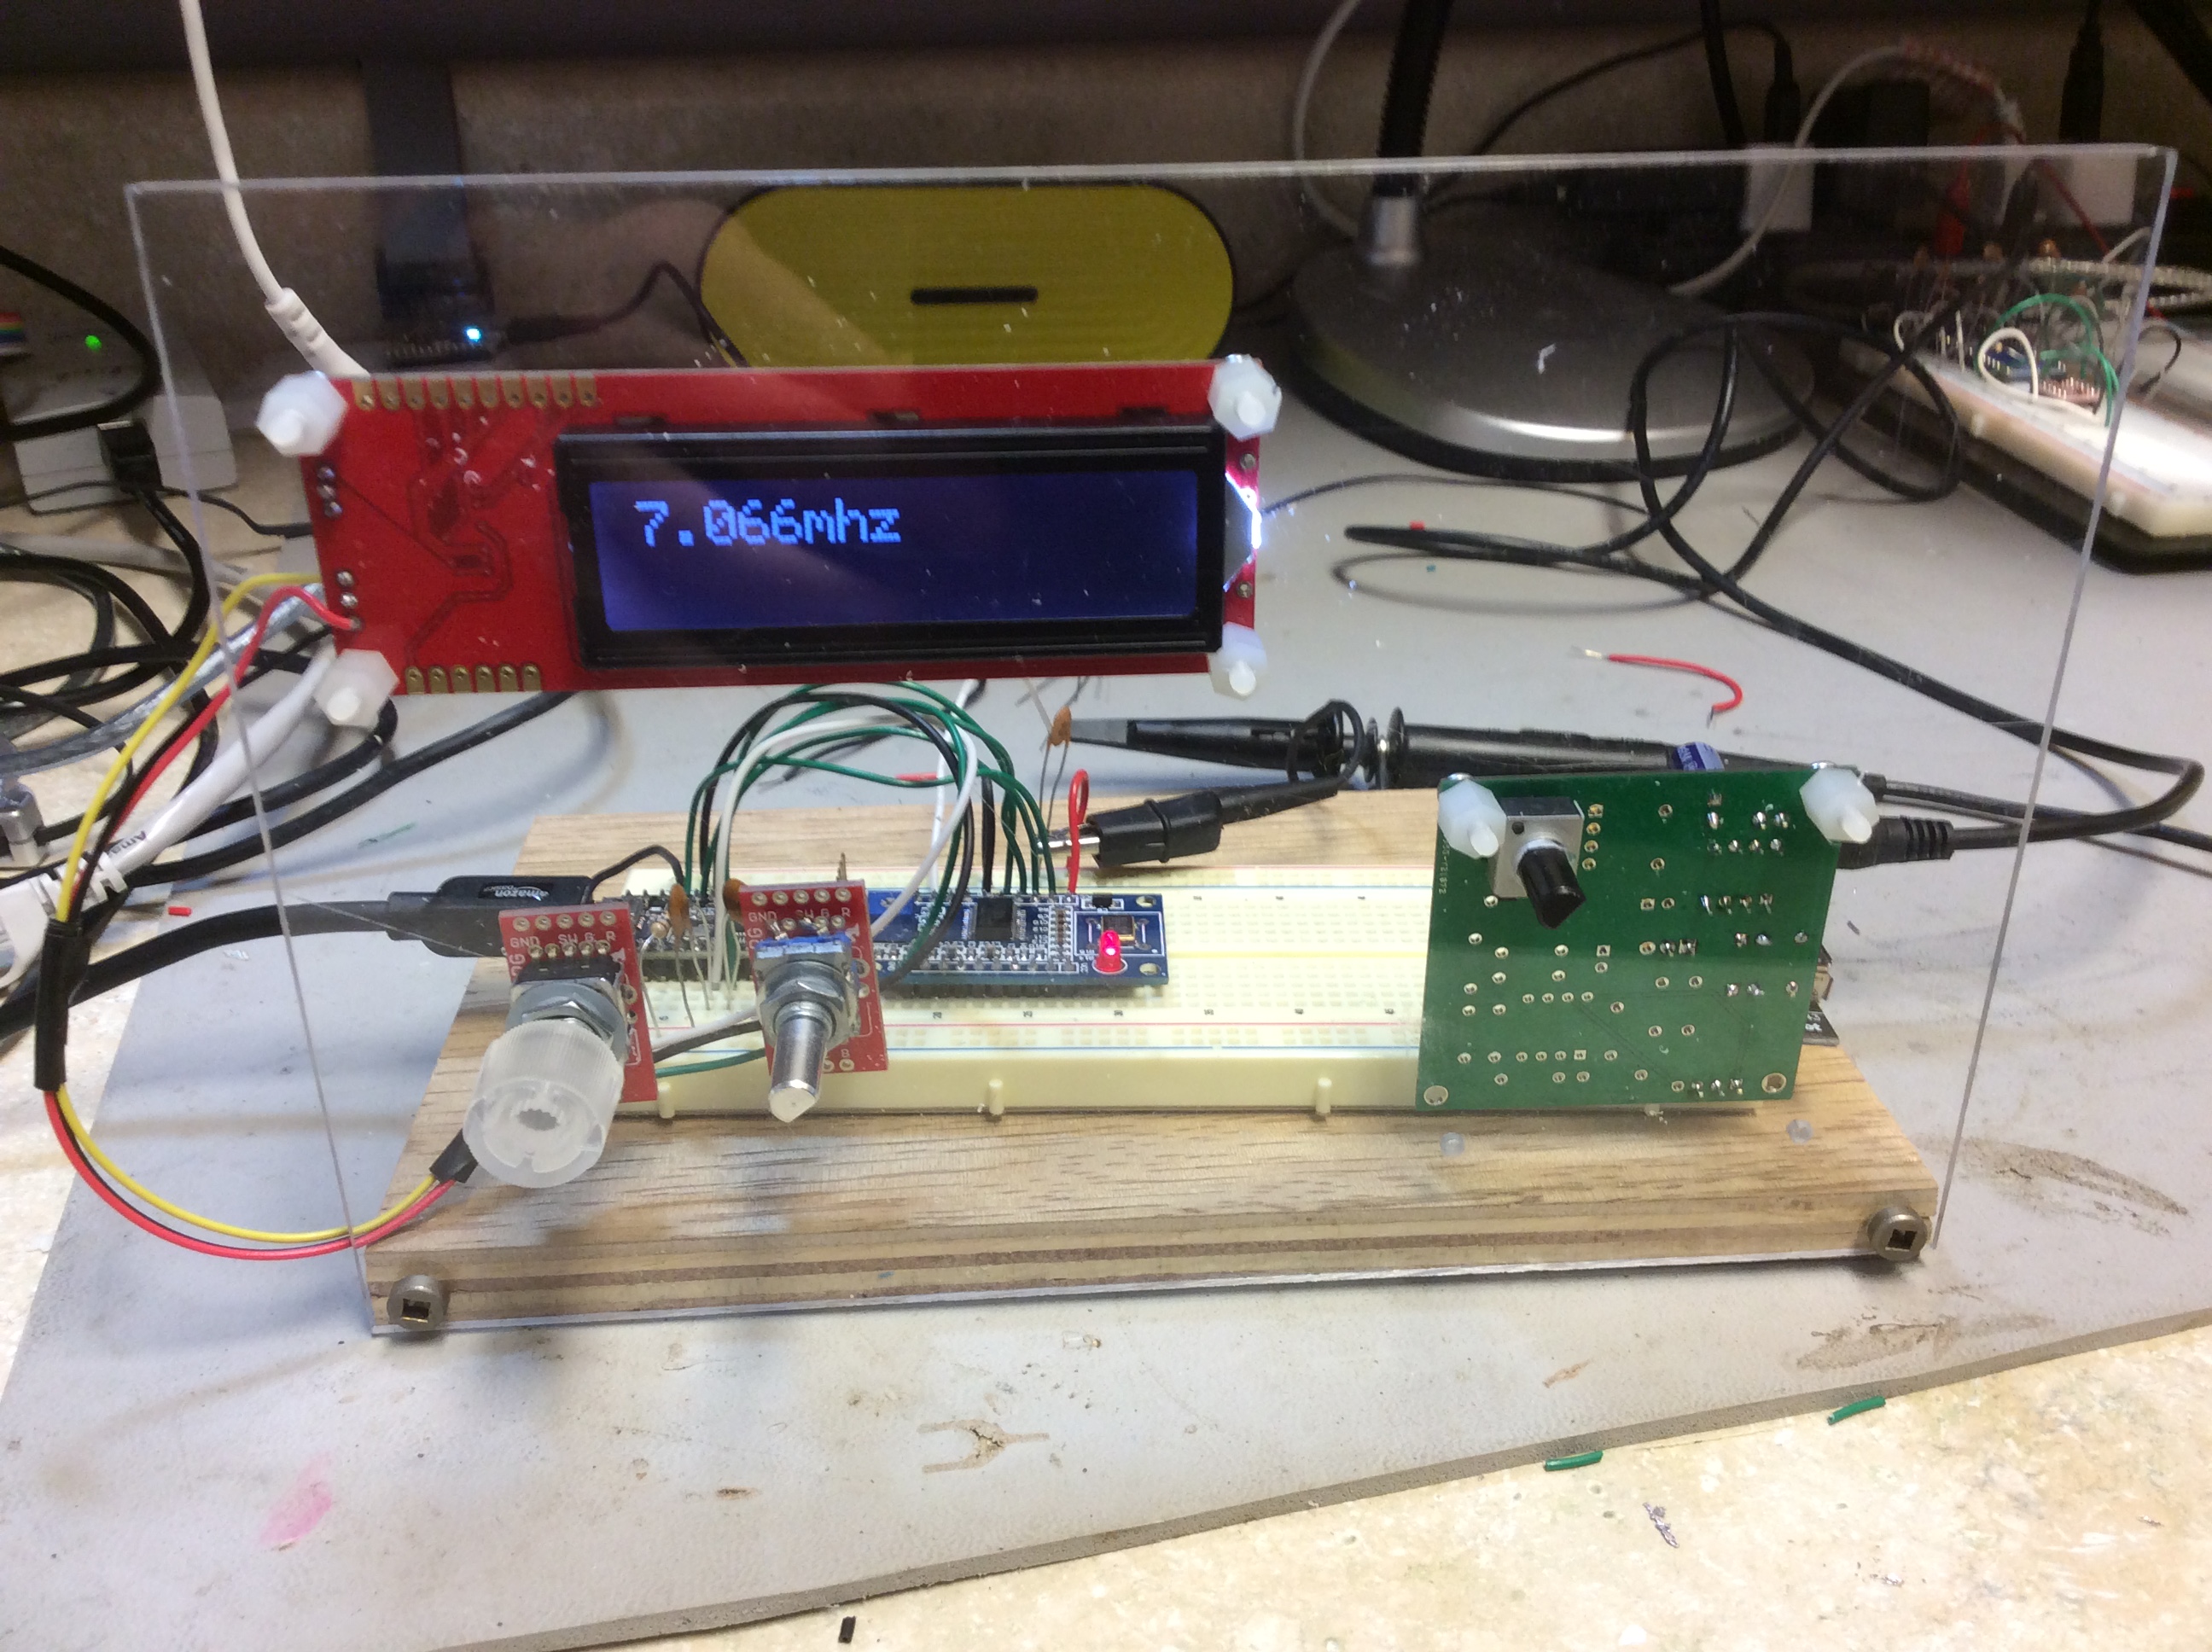
I’m working on a test bed transceiver. I’ve wanted something that is modular enough, that I can swap in and out sections to test new designs (and just have fun). This is a Teensy 3.1 with a cheap Chinese DDS board that contains an AD8550. I am using one of my LM380 audio boards, a Sparkfun Serial two line LCD, and a few rotary encoders for tuning.

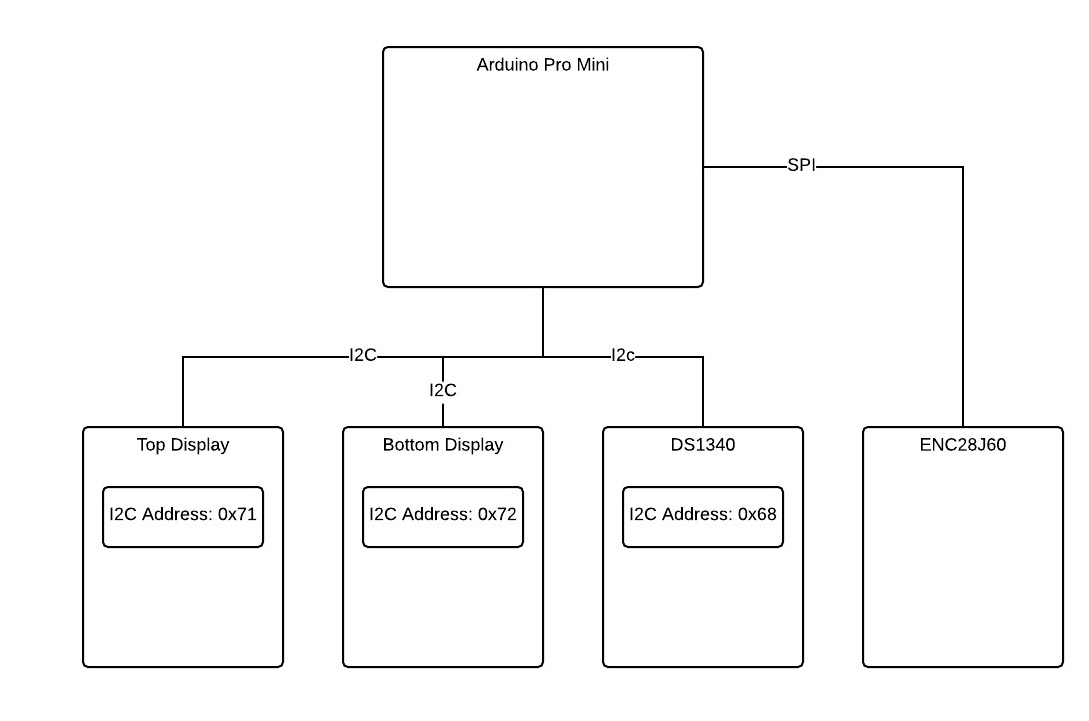
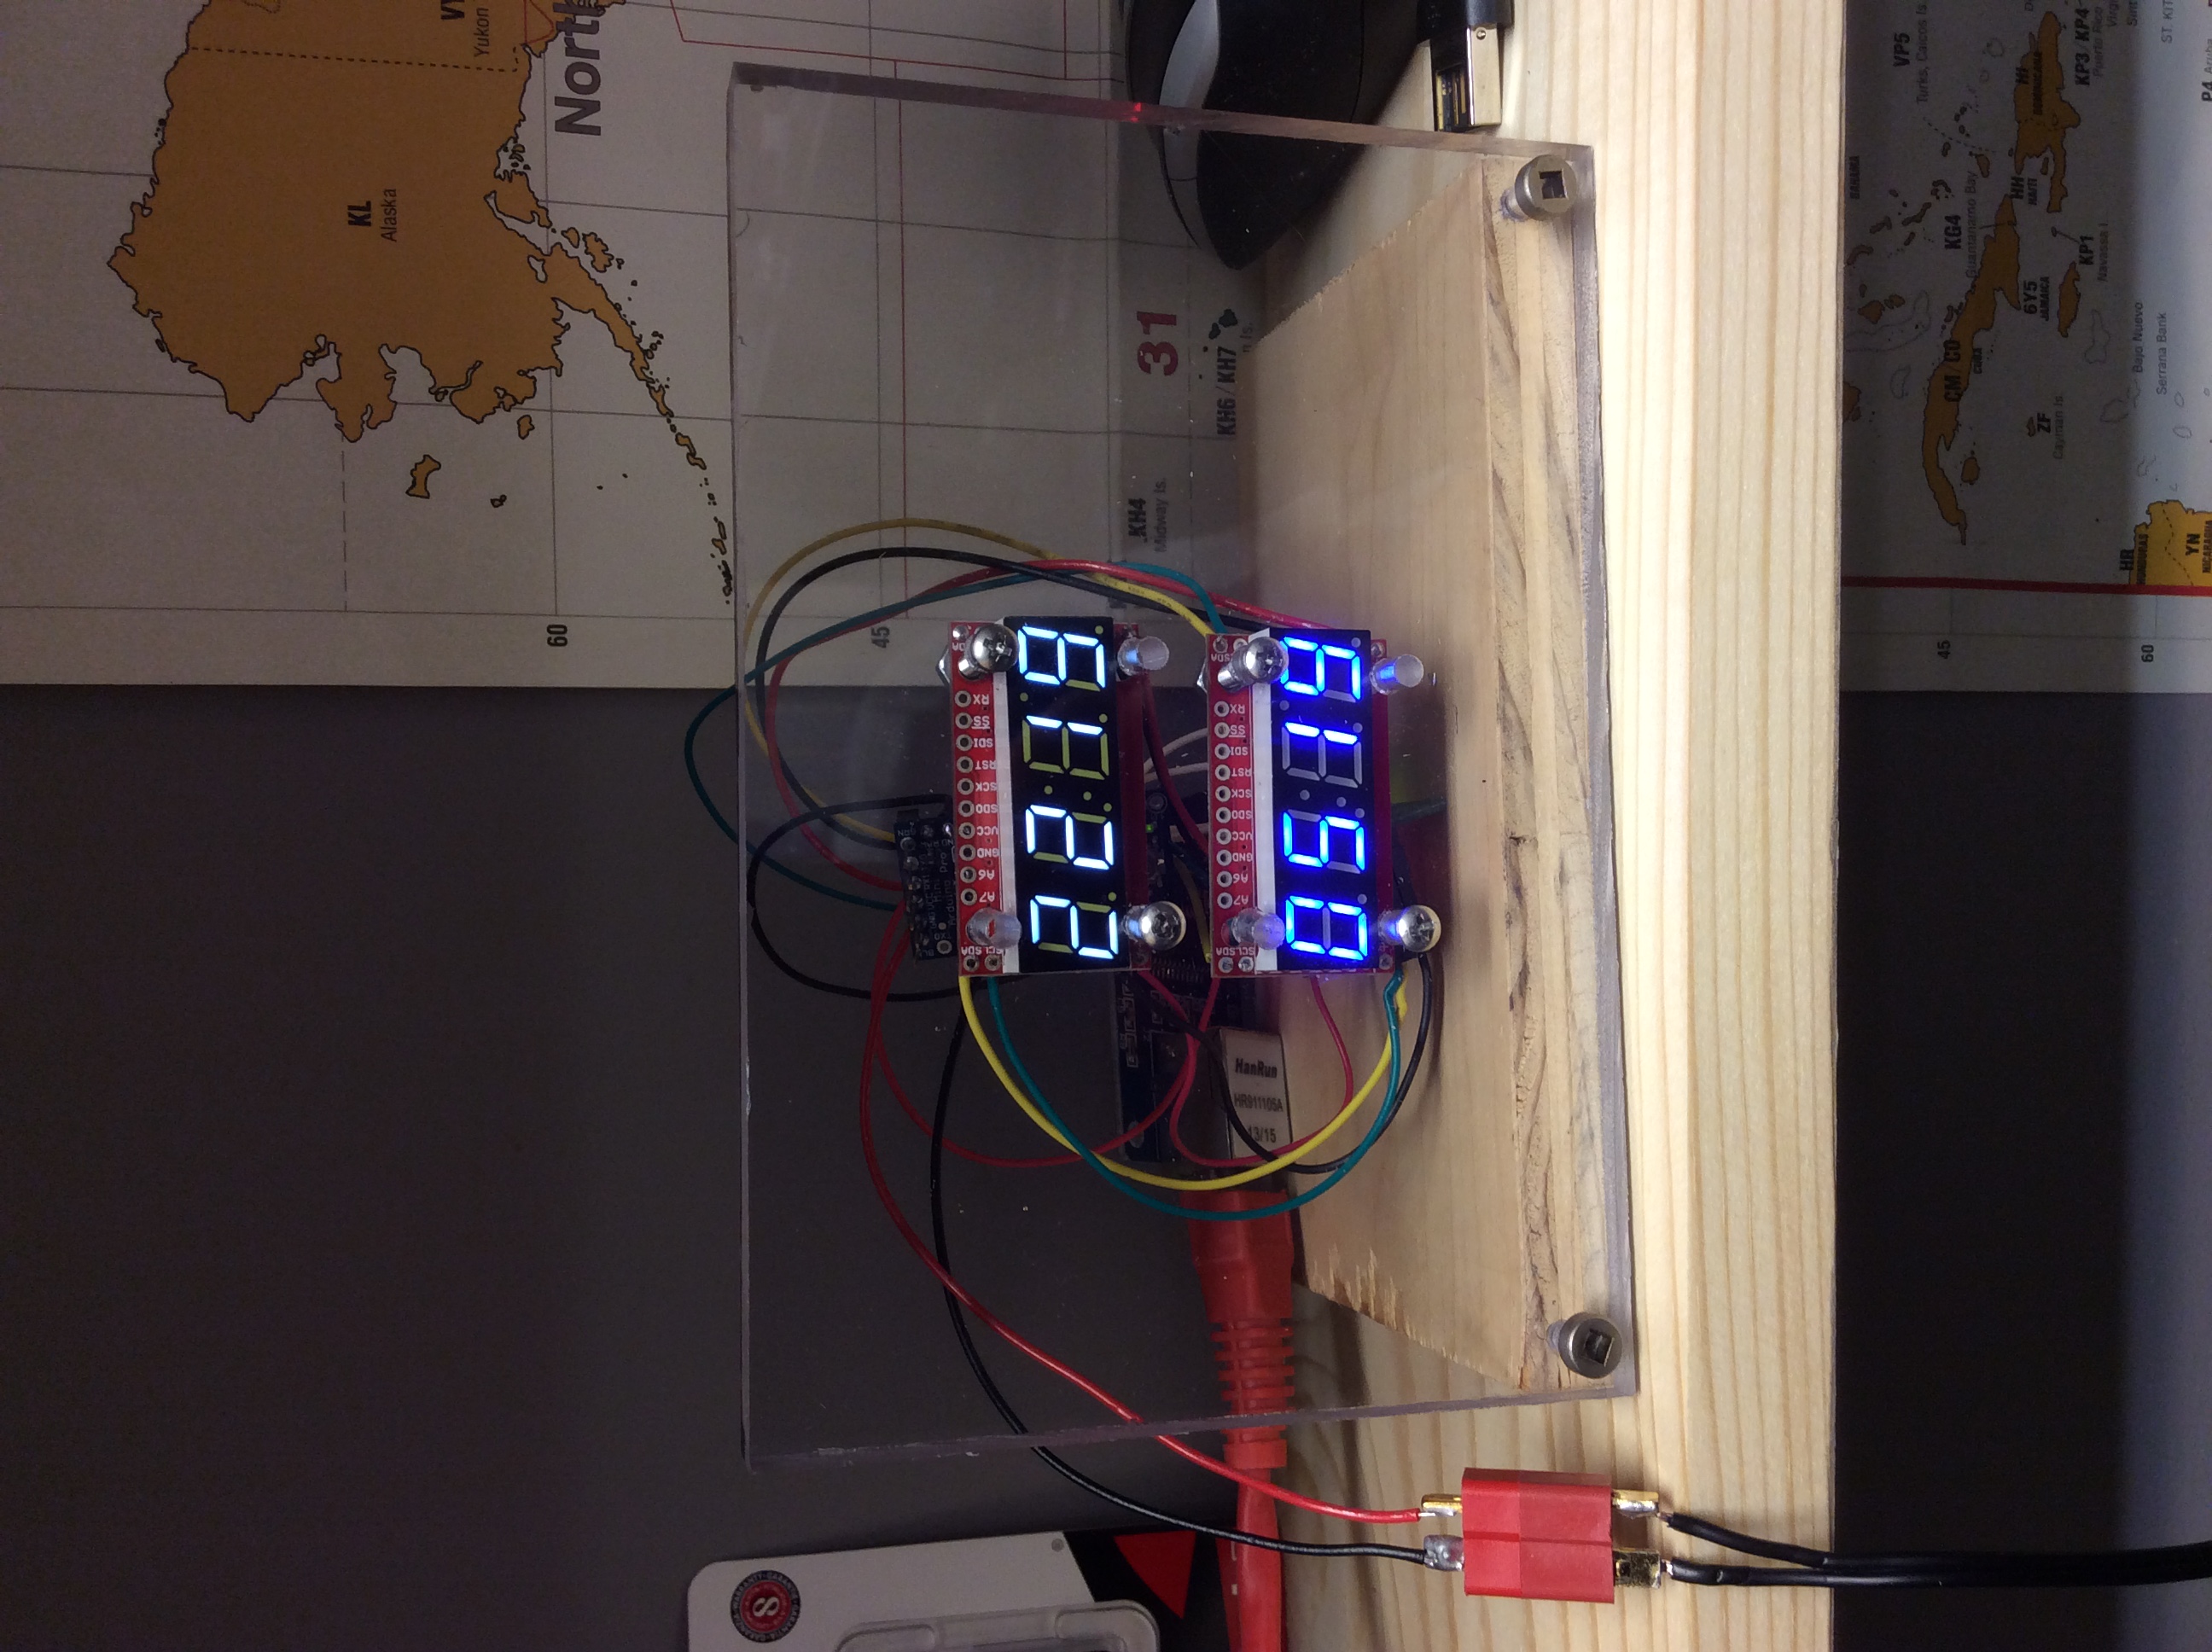
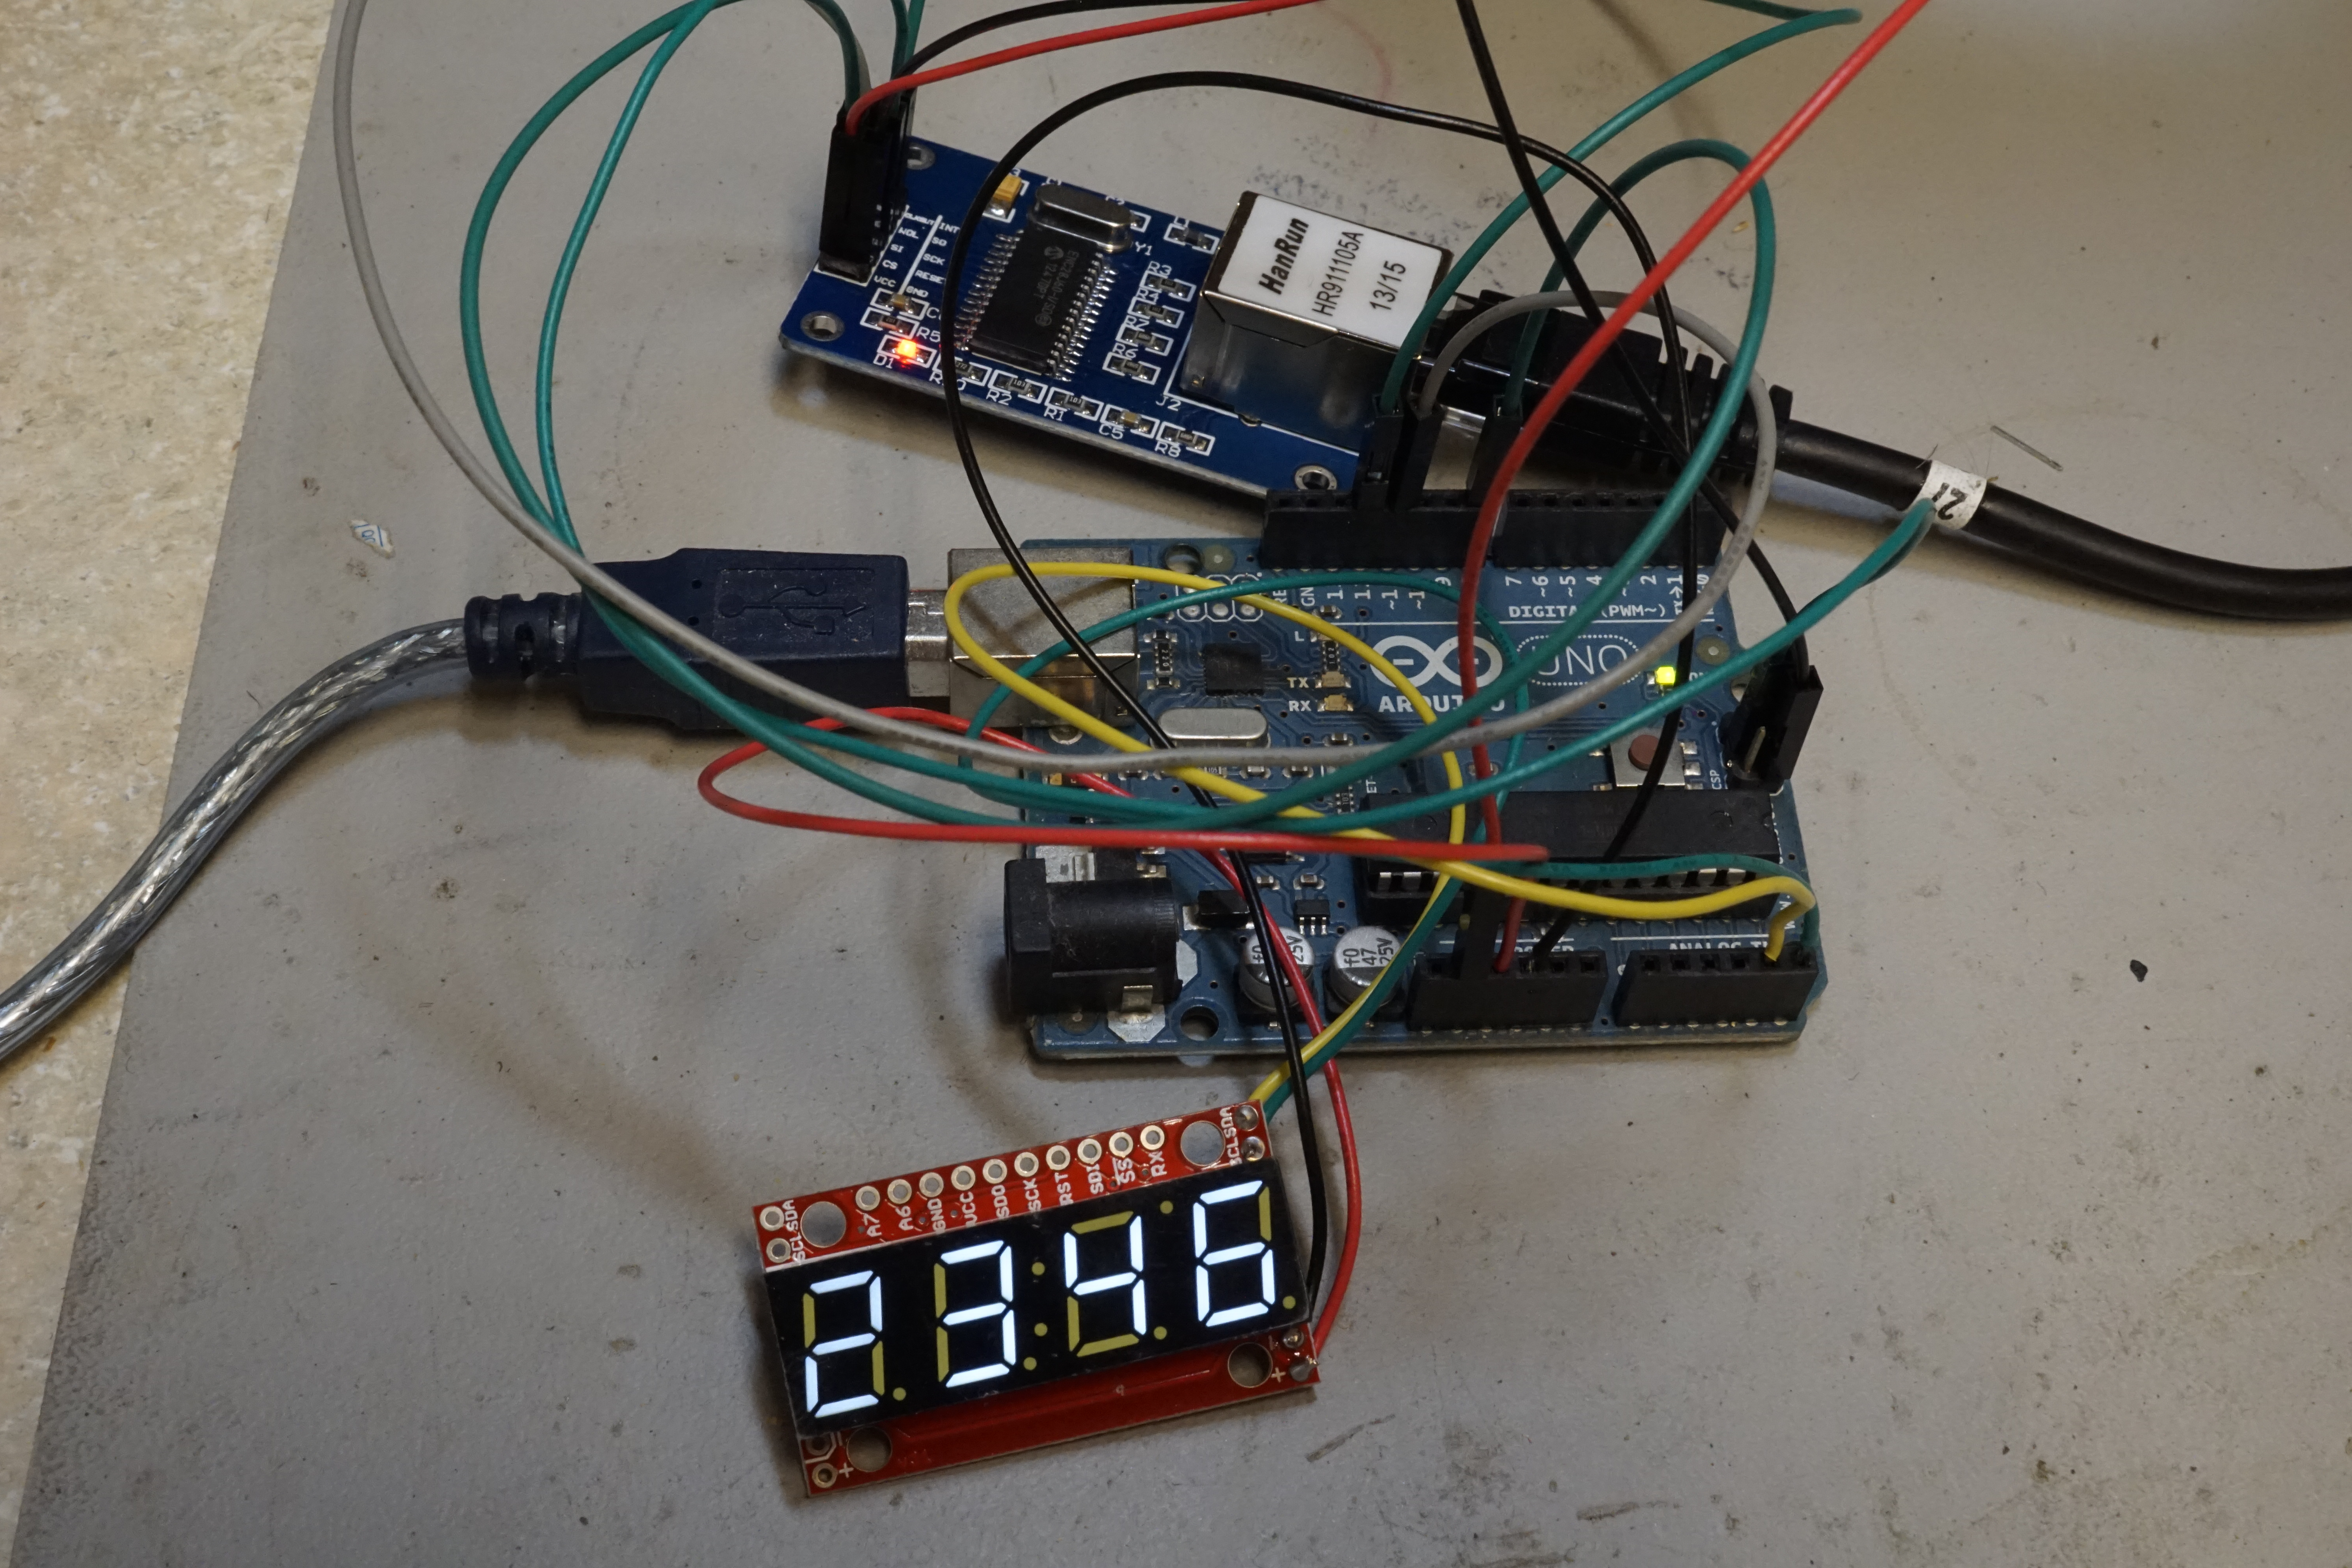
I’ve been looking for a two time zone clock that display my time zone (pacific) and GMT. A lot of Amateur Radio operators use GMT for logging. I built this network aware clock using an Arduino Pro mini, two Sparkfun 7-segment displays, a I2C RTC, and an ENC28J60 cheap Ethernet PCB.
There is an Arduino library Ethercard for the ENC28J60 with built-in API’s for DHCP, DNS, and NTP. The clock goes fetches the current time from an NIST NTP server, and updates the RTC every hour (perhaps too frequent). The display time is always derived from the RTC. With a backup battery in the RTC, this thing can go for days or weeks without a NTP update.
The ENC28J60 draws about 180ma. In total, the units draws about 200ma current.
The Sparkfun 7-Segment displays are based on ATMEGA328’s. This design could be simplified using one of those instead of the Arduino Pro Mini.
This weekend’s project is to pull out a [cheap] ethernet board that utilizes a ENC28J60, and build an NTP client that can display the time on a Sparkfun I2C 7-segment display. This is a building block for a future project that will integrate two displays (one that shows local time and the second for GMT) and use an RTC in addition to NTP.
I purchased the ENC28J60 board from Aliexpress at least a year ago. Getting DHCP to work correctly was the hardest part of this project. I never got DHCP to work correctly; in the end I resorted to using a static IP. It appears that the ENC28J60 does not like DHCP served up across a vlan boundary. I use multiple vlans in my house, and a Cisco L3 switch provides DHCP. The DHCP client gets an IP, but the final DHCPACK seems to get lost on both sides. Maybe I’ll pursue this further someday.
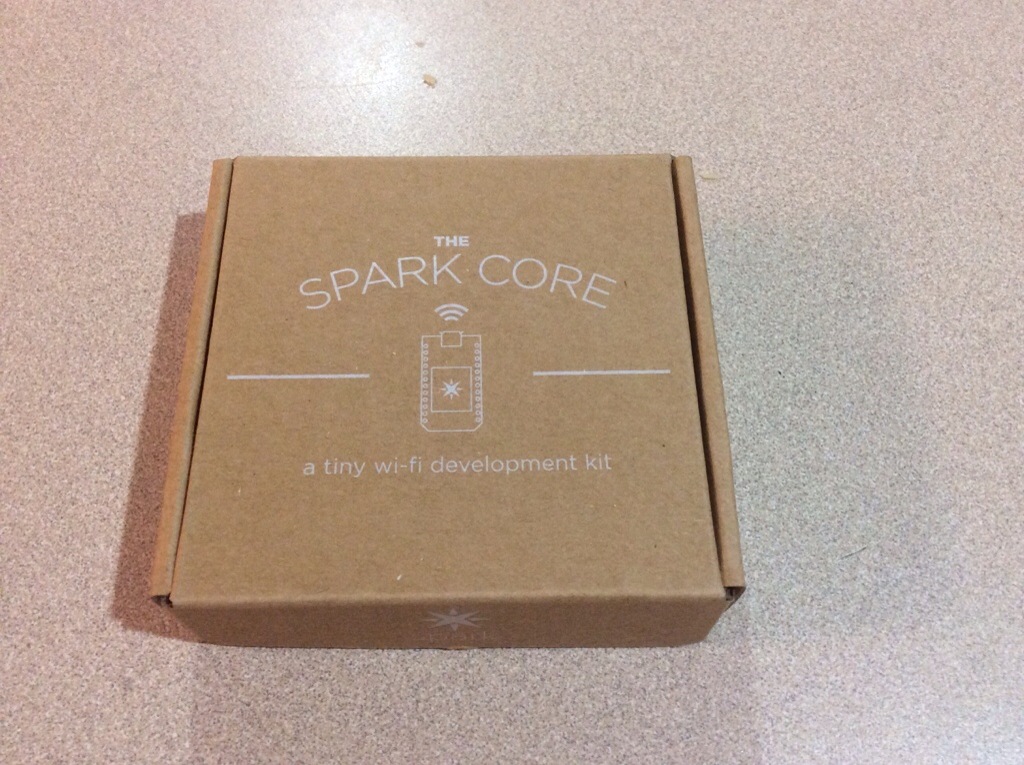
I ordered a Spark core post-Kickstarter. Interestingly, it shipped from Europe. Right out of the box, I could not get it to to connect to wifi (b/g). I tried configuring it by iOS app and by USB (cool!). It turns out that my ancient WAP54G was on channel 11. I changed the channel and it connected immediately. Weird.
I’ve used Electric Imps. I found them to be quirky and nearly impractical. The Imp cloud service is really hard to use. The API’s change a lot. The Imp would get stuck downloading new firmware and takes minutes to come back online after a hardware reset.
Want some quick starter code? Use this to control the built-in RGB LED.
void setup() {

    RGB.control(true);

}
void loop() {
RGB.color(255, 0, 0);
// wait one second
delay(1000);
RGB.color(0, 255, 0);
// wait one second
delay(1000);
RGB.color(0, 0, 255);
// wait one second
delay(1000);
}
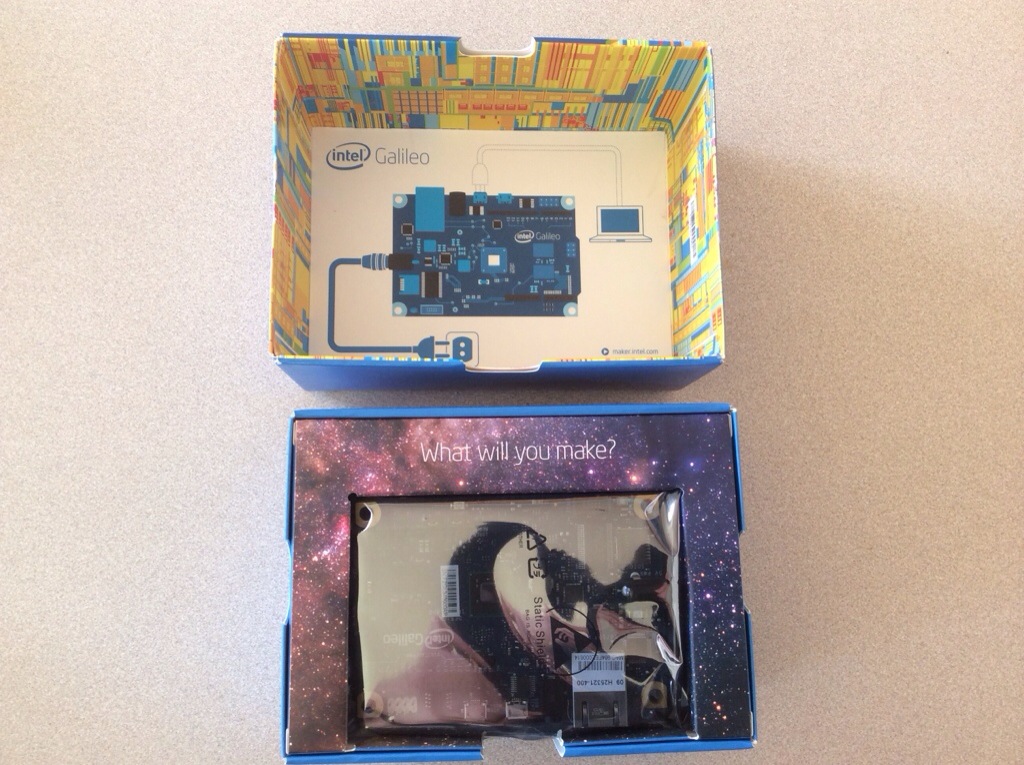
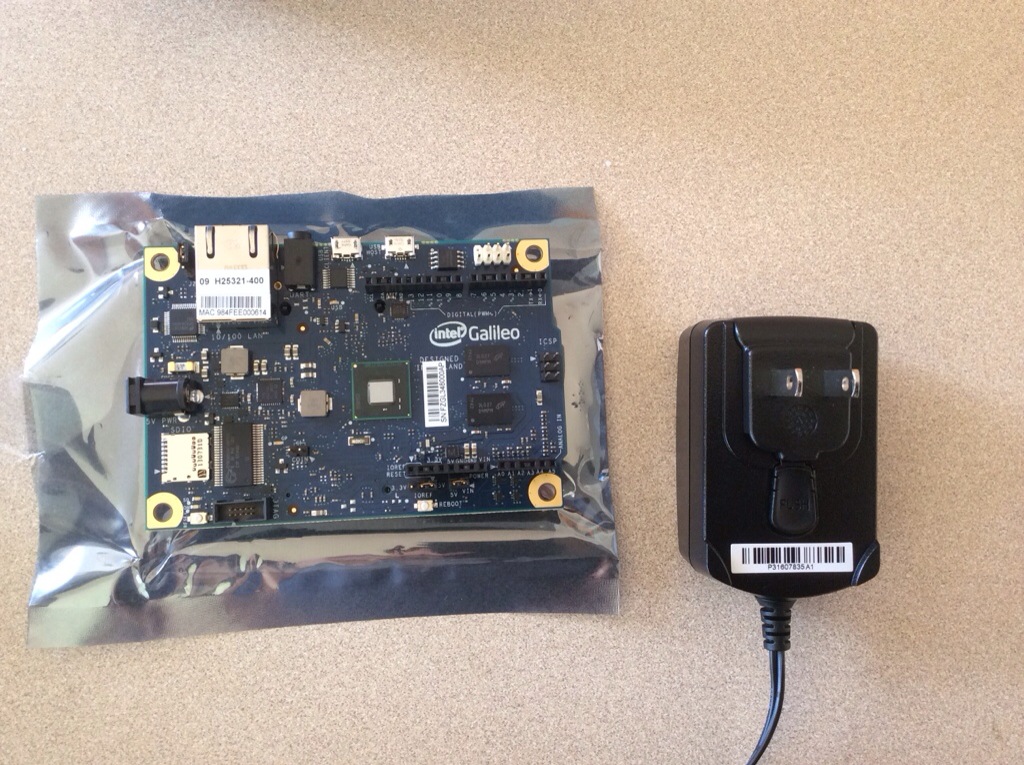
After several months on pre-order, my Intel Galileo board came in from Mouser. The release date kept getting bumped. No first impressions yet, but it is written in the docs to plug the board into power First, First, First! otherwise risk damage.
There is a Make: Getting Started with Intel Galileo that is up on Amazon.
Here is a link to Intel’s Getting Started docs.
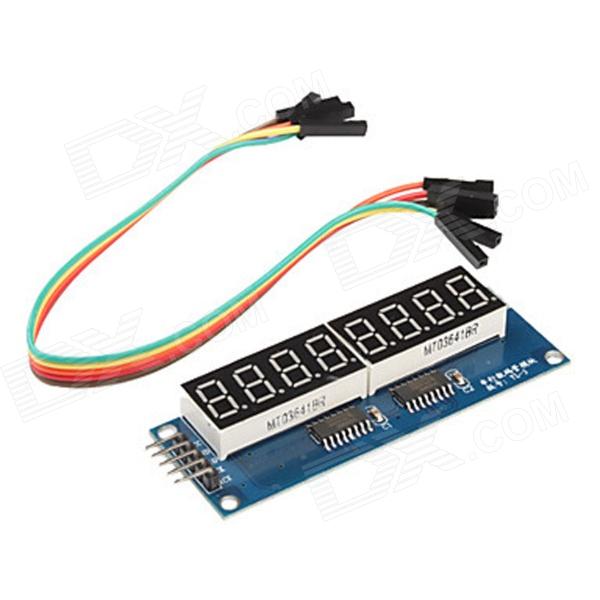
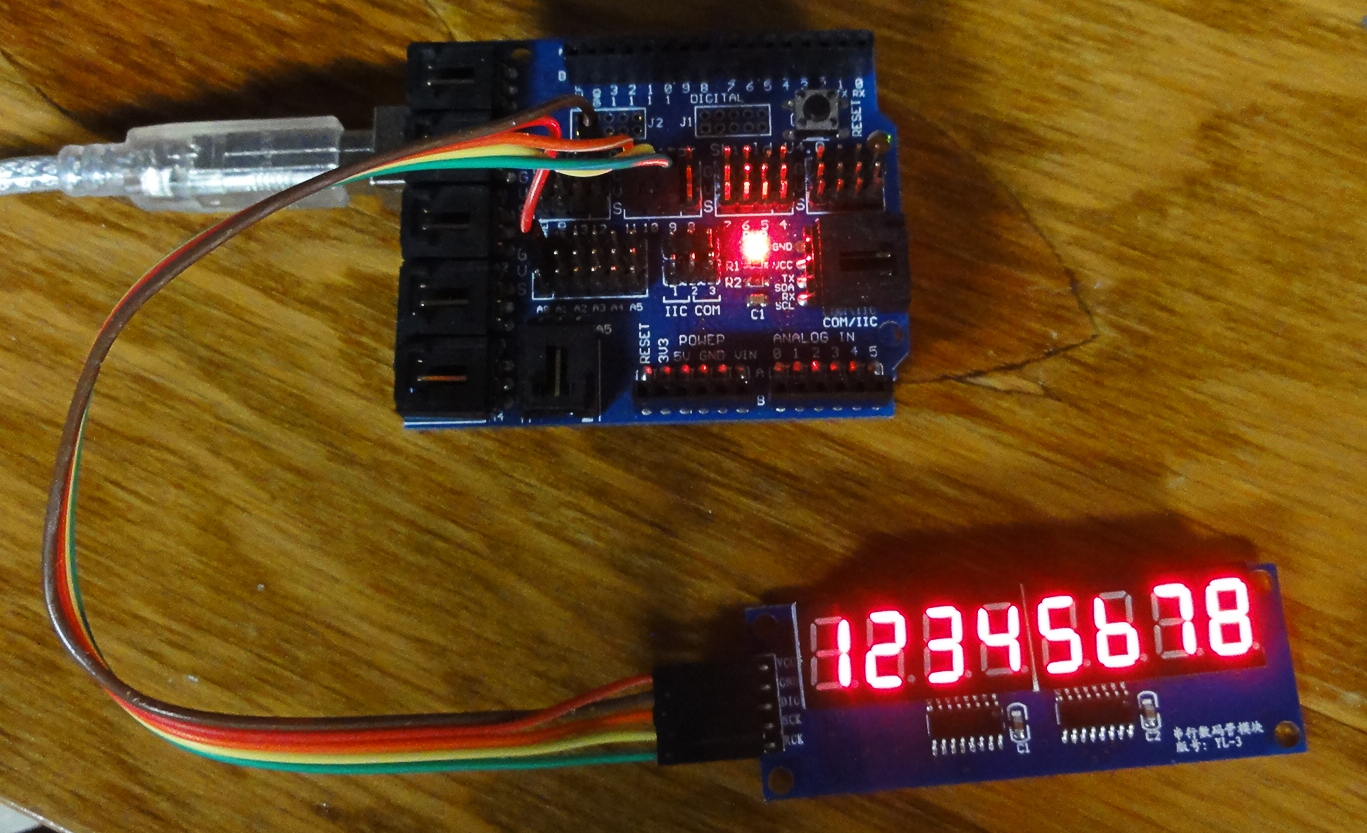
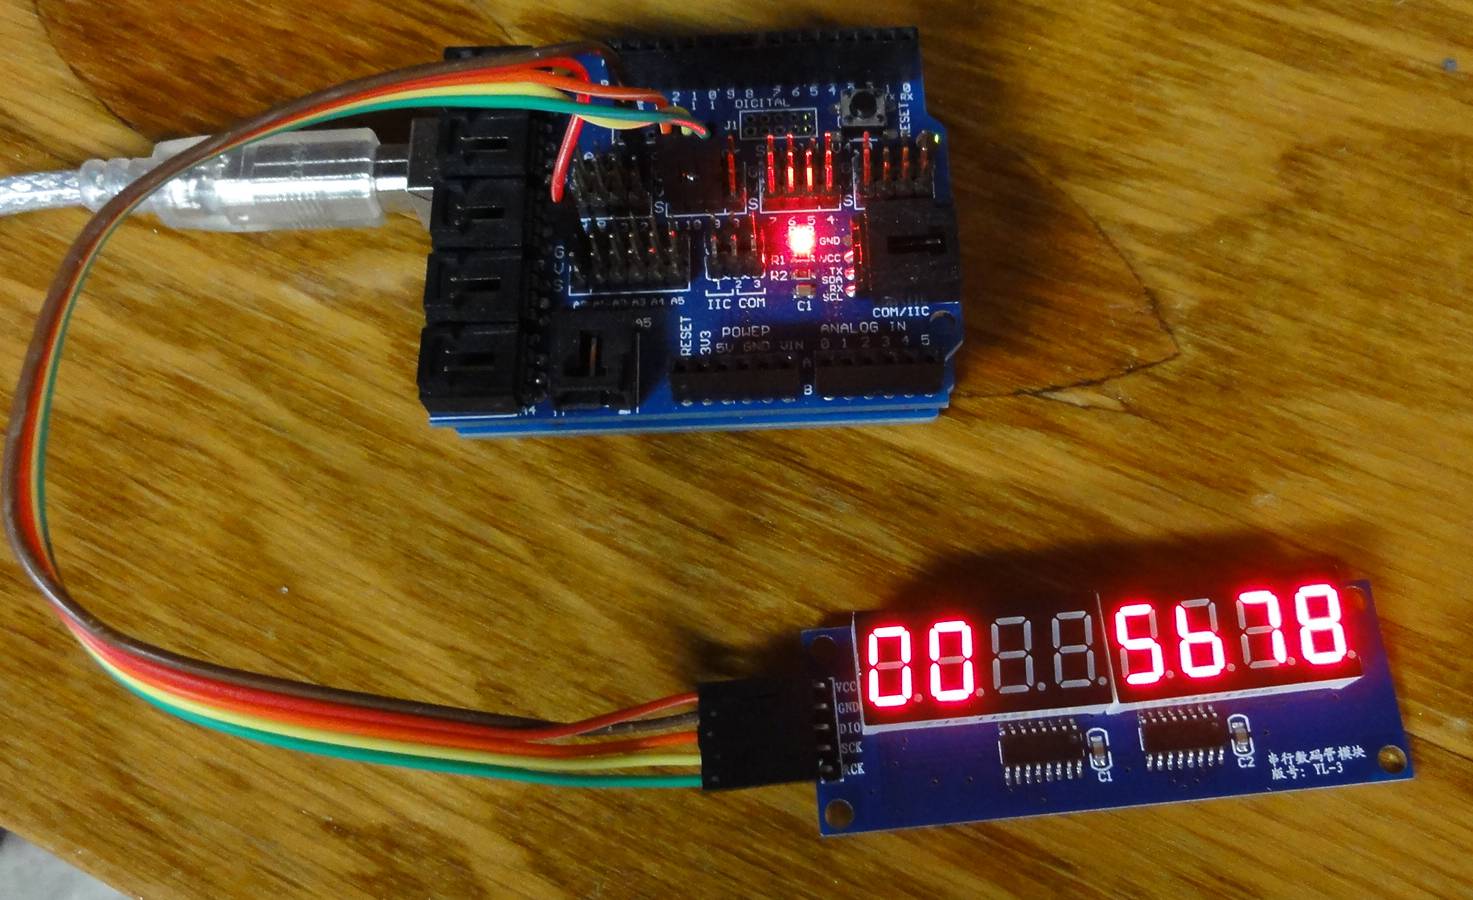
I ran across this cheap (USD$4.70 SKU 250813) multi digit 7 segment display from DealExtreme. It’s composed of 3461BS displays and two 74HC595D shift registers. It runs cleanly on 5VDC (only voltage I tested). It requires three GPIO lines to run (latch, data, clock). Because the displays are multiplexed, it can only display one character at a time. This means you need to set activate each character faster enough to avoid any flicker (at least >= 20 hertz).
#define latch 9
#define clock 10
#define data 11
#define kDigitCount 8

char gDisplayBuffer[kDigitCount+1];

void setup()
{
   pinMode(latch, OUTPUT);
   pinMode(clock, OUTPUT);
   pinMode(data, OUTPUT);

   Serial.begin( 9600 );

   memset(gDisplayBuffer, ' ', kDigitCount);
}


void writeDigit(int digit, char inValue)
{
  byte value = 0;
  byte bitsToSend = 0;

  bitSet(bitsToSend, digit);

  digitalWrite(latch,LOW);
  shiftOut(data,clock,MSBFIRST, bitsToSend);


    switch (inValue)
    {
        case '.': value = B01111111; break;
        case '1': value = B11111001; break;
        case '2': value = B10100100; break;
        case '3': value = B10110000; break;
        case '4': value = B10011001; break;
        case '5': value = B10010010; break;
        case '6': value = B10000011; break;
        case '7': value = B11111000; break;
        case '8': value = B10000000; break;
        case '9': value = B10010000; break;
        case '0': value = B11000000; break;
        case 'H': value = B10001001; break;
        case 'i': value = B11111011; break;

        default:
        case ' ': value = B11111111; break;
    }

    shiftOut(data,clock,MSBFIRST,value);

  digitalWrite(latch,HIGH);
}

void writeToDisplay(bool inOveride)
{
  for (int i = 0 ; i < kDigitCount ; i++)
  {
    if (' ' != gDisplayBuffer[i] || inOveride)
      writeDigit(i, gDisplayBuffer[i]);
  }
}

void loop()
{
  char cmdBuffer[16];

  if (0 < Serial.available())
  {
      memset(cmdBuffer, ' ', 16);
      int iBytes = Serial.readBytesUntil('\n', cmdBuffer, 16);
      cmdBuffer[iBytes] = 0;

      if (!strncmp(cmdBuffer, "SET ", 4))
      {
        if (12 != strlen( cmdBuffer))
          Serial.println("ERR");
        else
          memcpy(gDisplayBuffer, &cmdBuffer[4], kDigitCount);
      }
      else if (!strncmp(cmdBuffer, "CLR", 3))
      {
          memcpy(gDisplayBuffer, "        ", kDigitCount);

          writeToDisplay(true);
      }
  }

  writeToDisplay(false);
}
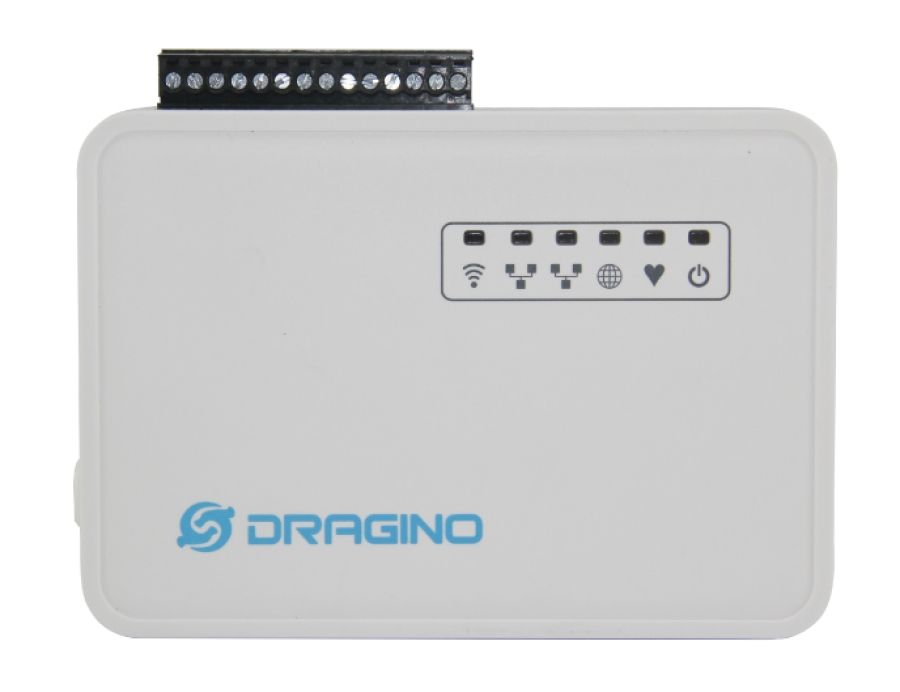
The Dragino v2 was just released. This little device runs OpenWRT, supports wifi and mesh networking, and has remote flash of AVR (or Arduino) devices. The power consumption is rated at 1 watt…which is really good. This makes it feasible to run this from solar power.
This device has dropped to a great price point: $45. This makes it equivalent to a raspberry pi. It’s a nice price point to do home automation or remote DAQ.
Edit 12/23: The Dragino is now starting to show up Amazon Prime. This sounds a lot of effort arranging shipping from China,
I’m a big fan of Fridays, not just because the weekend is close, but Friday is the day SparkFun releases new products. I have a special box near my home work bench with all the breakout boards I’ve purchased through the past few years. I have a break board for almost every purpose. Even the chinese are seeing value in producing breakout boards for smaller SMD components. You can find a number of interesting modular pieces on ebay through other Hong-King storefronts.
The state of industry (and market demand) is now advanced enough that kits are being produced using several different breakout boards. Take for example the FabFM kit. It uses a SI4703 breakout board. Anyone could modify such a kit with extra features, but it also looks aesthetically pleasing.
I’m starting to outfit sensors on my black Friday Zumo (mini sumo). The Zumo is small, finding ways of securely mounting sensors is a challenge. I started by bending the center section between anchor screws of the wedge that Pololu sells up, then tapping it for screws to hold a Sharp IR sensor.
I also added spacers to fit a Wixel shield upside down. Score!

