Build Log: Automated Barn Door Star Tracker Part 2

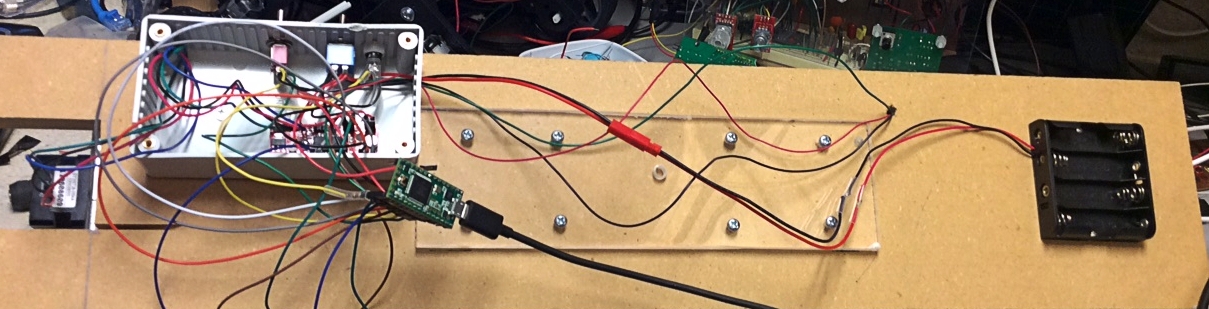
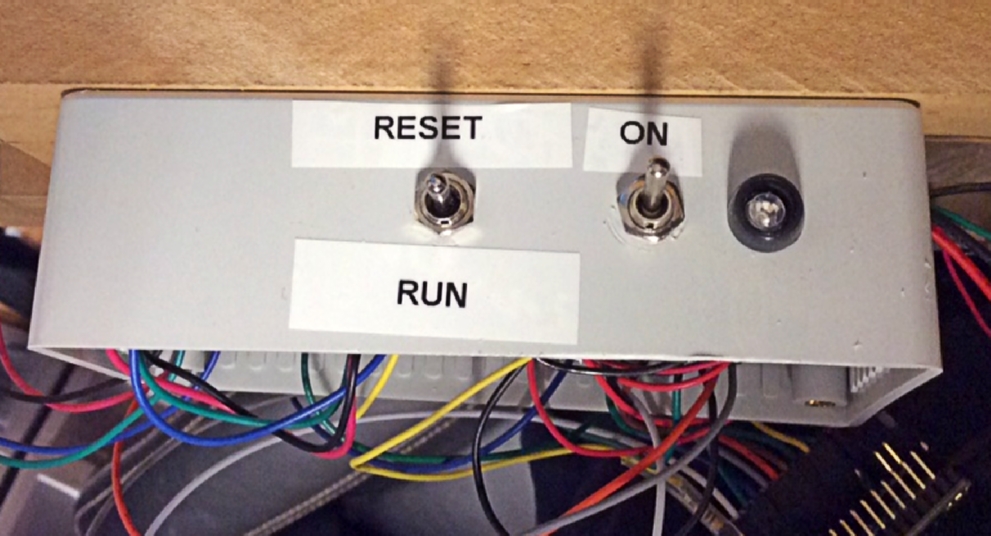
I made progress on the barn door star tracker. A few weeks ago I got the switches debounced (in software). I put labels on the control box. The control box hangs on the bottom of the platform. It’s attached at one side for easy access. The control box has the two switches and an LED mounted on it. Inside the box is an EasyDriver and a Teensy 3.1. The batteries won’t fit in the box, so I mounted them on the other end of the platform.

I’ve written enough of the software to get the reset “program” working. If you click the momentary switch towards reset, then it will lower the platform until the limit switch is triggered. I’ve got the “run” program sketched out so I know the motors will move. The next step is to measure the actual speeds and introduce the math equation to make it the motor speed track the Earth’s rotation.


image1 copy


image2 copy


image3 copy

2016 Visit to Crater Lake

On vacation this past week, we visited Crater Lake National Park twice. The weather was 70F on July 5th and low 50’s on July 8th. The park was typically busy for the holiday week. Rim Village was super packed. There is a lot of construction starting on the roads. East Rim Road was still closed. The trail down to the lake is going to be closed for the season on August 15th. The mosquitoes are out in force; Klamath County has several reported cases of West Nile virus, so bring the bug spray.


crater lake 2016

Crater Lake 2016


vidae falls crater1


I took these photos with my Sony A6000 and a Sony 10-18mm lens. When the sun was out I could shoot at ISO 100. I post processed these with ON1 Photo 10.

Build Log: Automated Barn Door Star Tracker

My friend Jim Choate told me about his ideas around building an Arduino based barn door star tracker. I decided I could use one of these for some astro-photography out at The Cabin. After checking my parts bins, I found almost all the parts needed to build one. I set out with the goal of building a tracker with the least out of pocket costs.


I am reusing some MDF 3/4 inch board for the base and top. I drilled and tapped a piece of acrylic for the tripod mount on the bottom. This worked surprisingly well. I had to purchase a hinge at Home Depot. This is the largest source of “slop” in my implementation. The hinge is hard to mount such that the bottom and top “door” align when closed. I’m using the other hinge to anchor the stepper motor. I purchased a $13 lead screw off Amazon and a 5mm to 8mm shaft adapter. The camera mount is a ball head adapter for a tripod.

I have not wired this up yet. I’ve ordered a replacement shaft adapter. The one initially purchased has a spiral anti-backlash cut. It flexes dangerously when rotating the lead screw by hand. I predict it will break.


tracker1


tracker2


tracker mount

New Gear: Sigma DP1 Camera

Ever since I read about the Foveon sensor, I’ve wanted to own one. I have strange attraction to weird and off kilter gear (really of any kind). Finally won an auction for one on ebay (an original Sigma DP1). There is are more modern versions like the DP1 Merrill.

Sigma DP1

A few observations:

  • This thing is slow!
  • It will not focus up close; needs like 12 to 20 inches
  • The controls are not intuitive, but surprisingly not hard to use
  • The output looks noisier than I expected as ISO400

I like how the pictures look in black and white. Here is an example picture shot in RAW and processed in Perfect B&W.

PacTrust pond

SDIM0013