I finally got a YouTube video put together that shows the water system at the cabin. Everything runs on batteries and solar panels. A Grundfos SQFlex pumps water from the well, and a Surflo 4008 12V RV pump provides pressure to drip irrigation and the house.
Winterizing the cabin
Winter is almost here in Oregon. This is the first time I’ve had to seriously winterize the utilities. I need to blow out the water from all the water lines and the Rinnai on-demand hot water heater. Instead of using a small utility compressor, I decided to use a higher volume electric tire pump. I settled on the Viair 88p. This sucker is rated at consuming 17 amps of power. Wow.
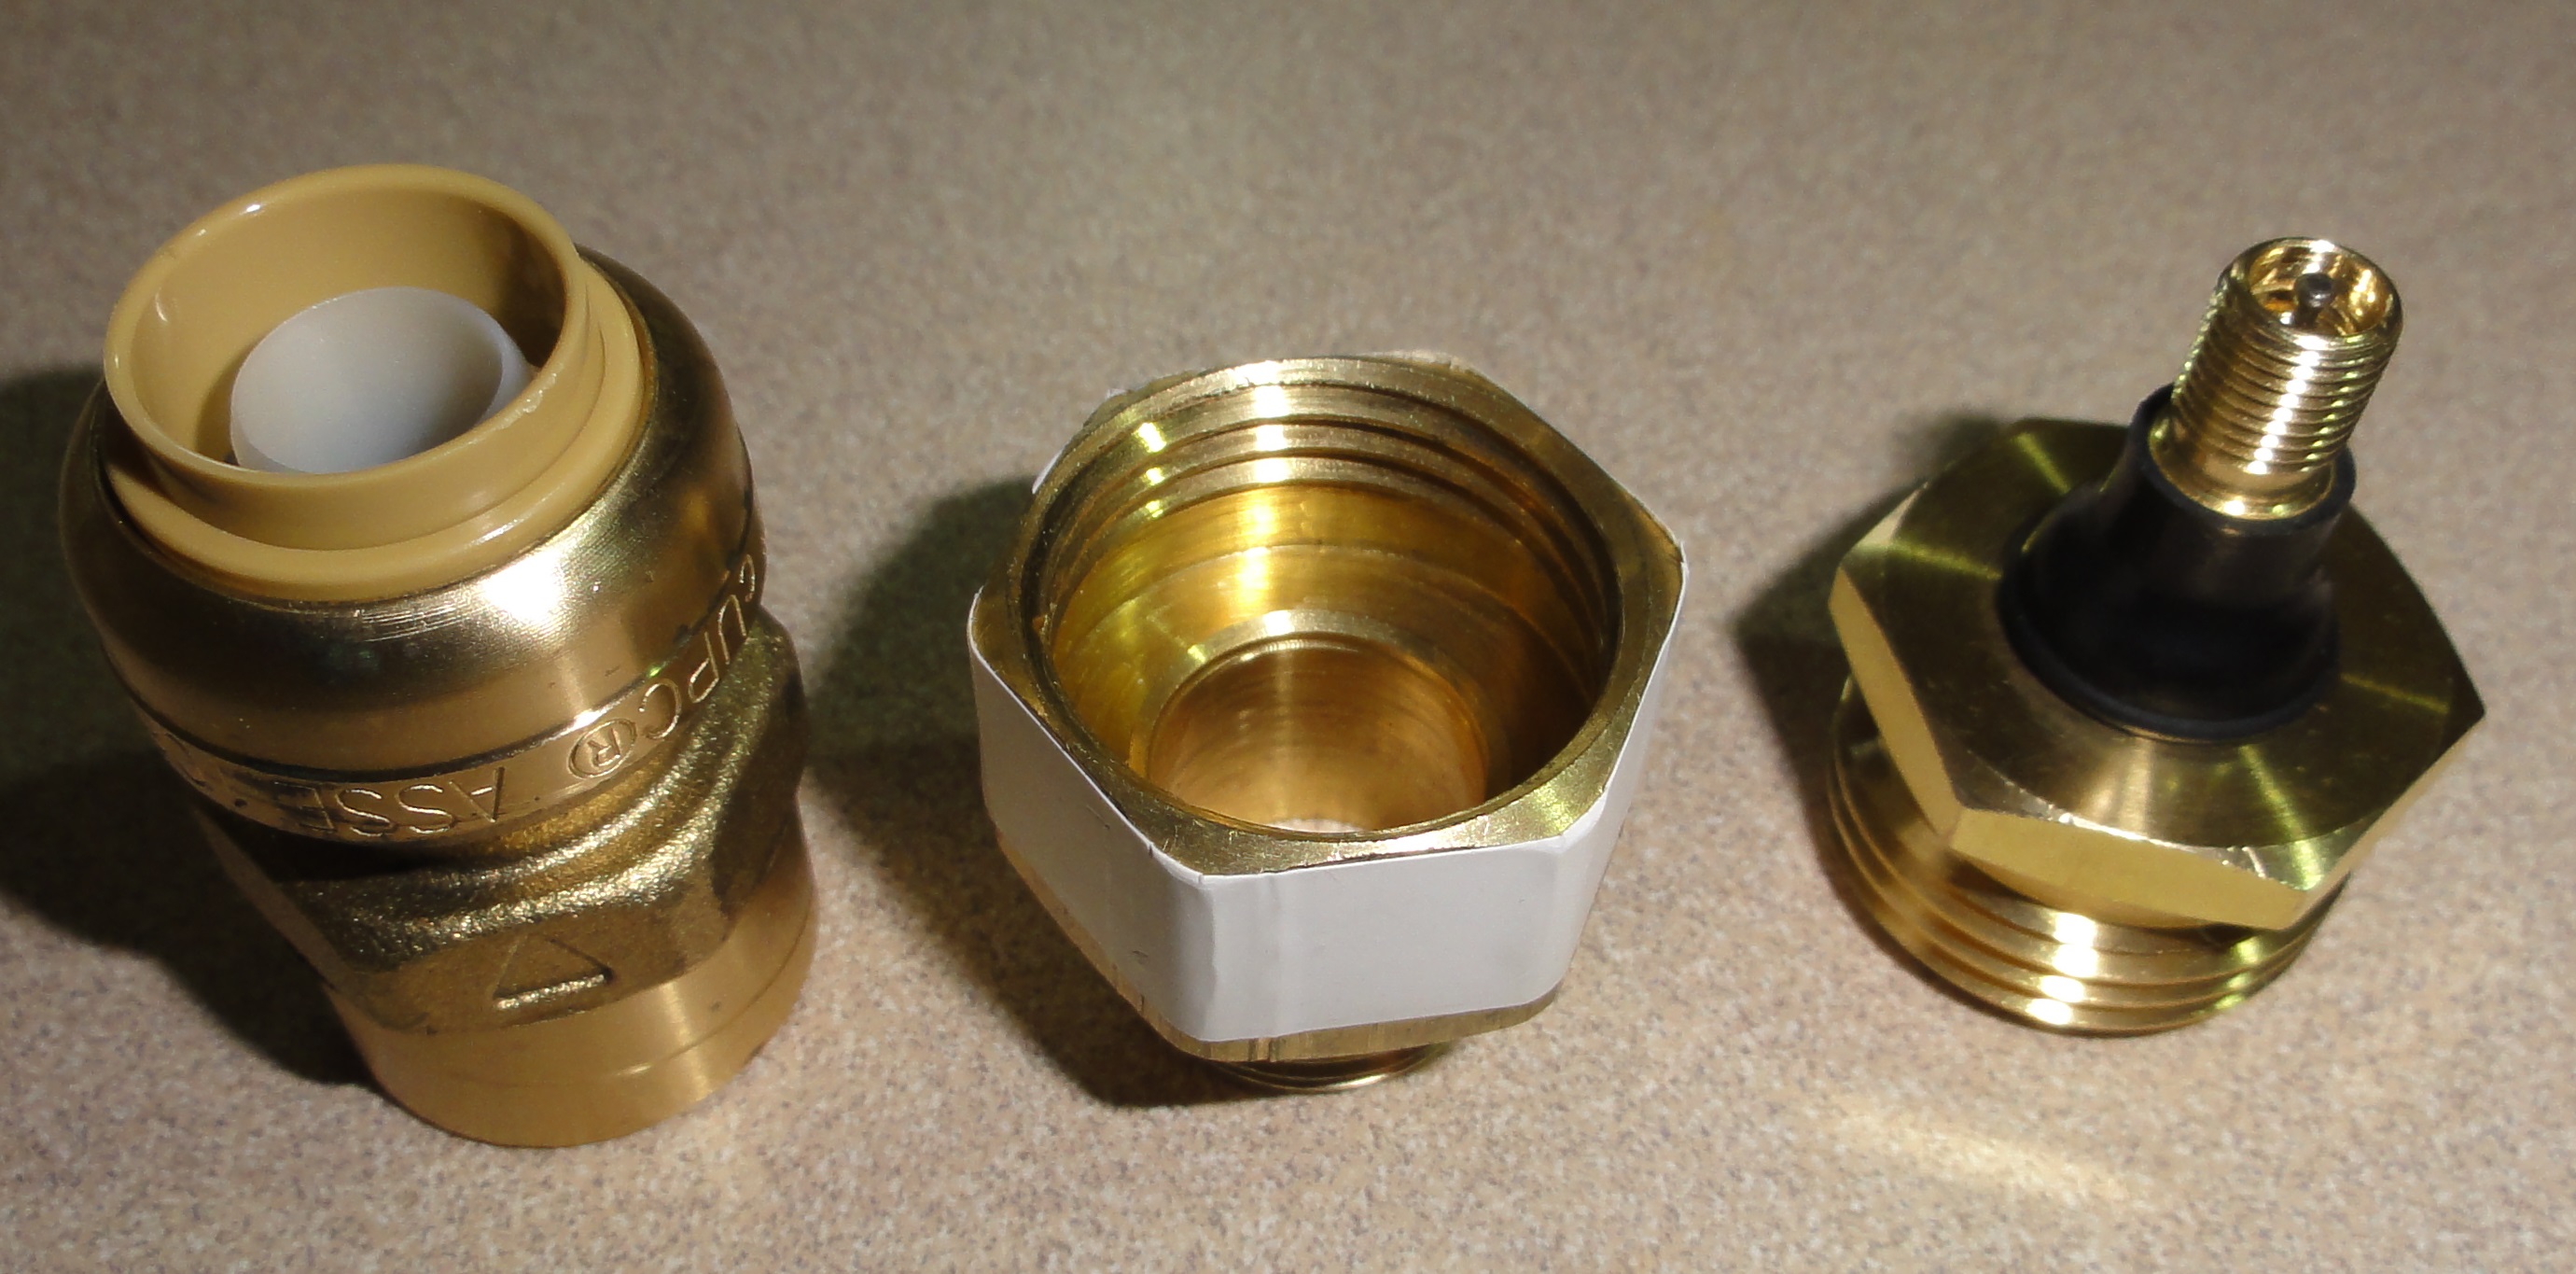
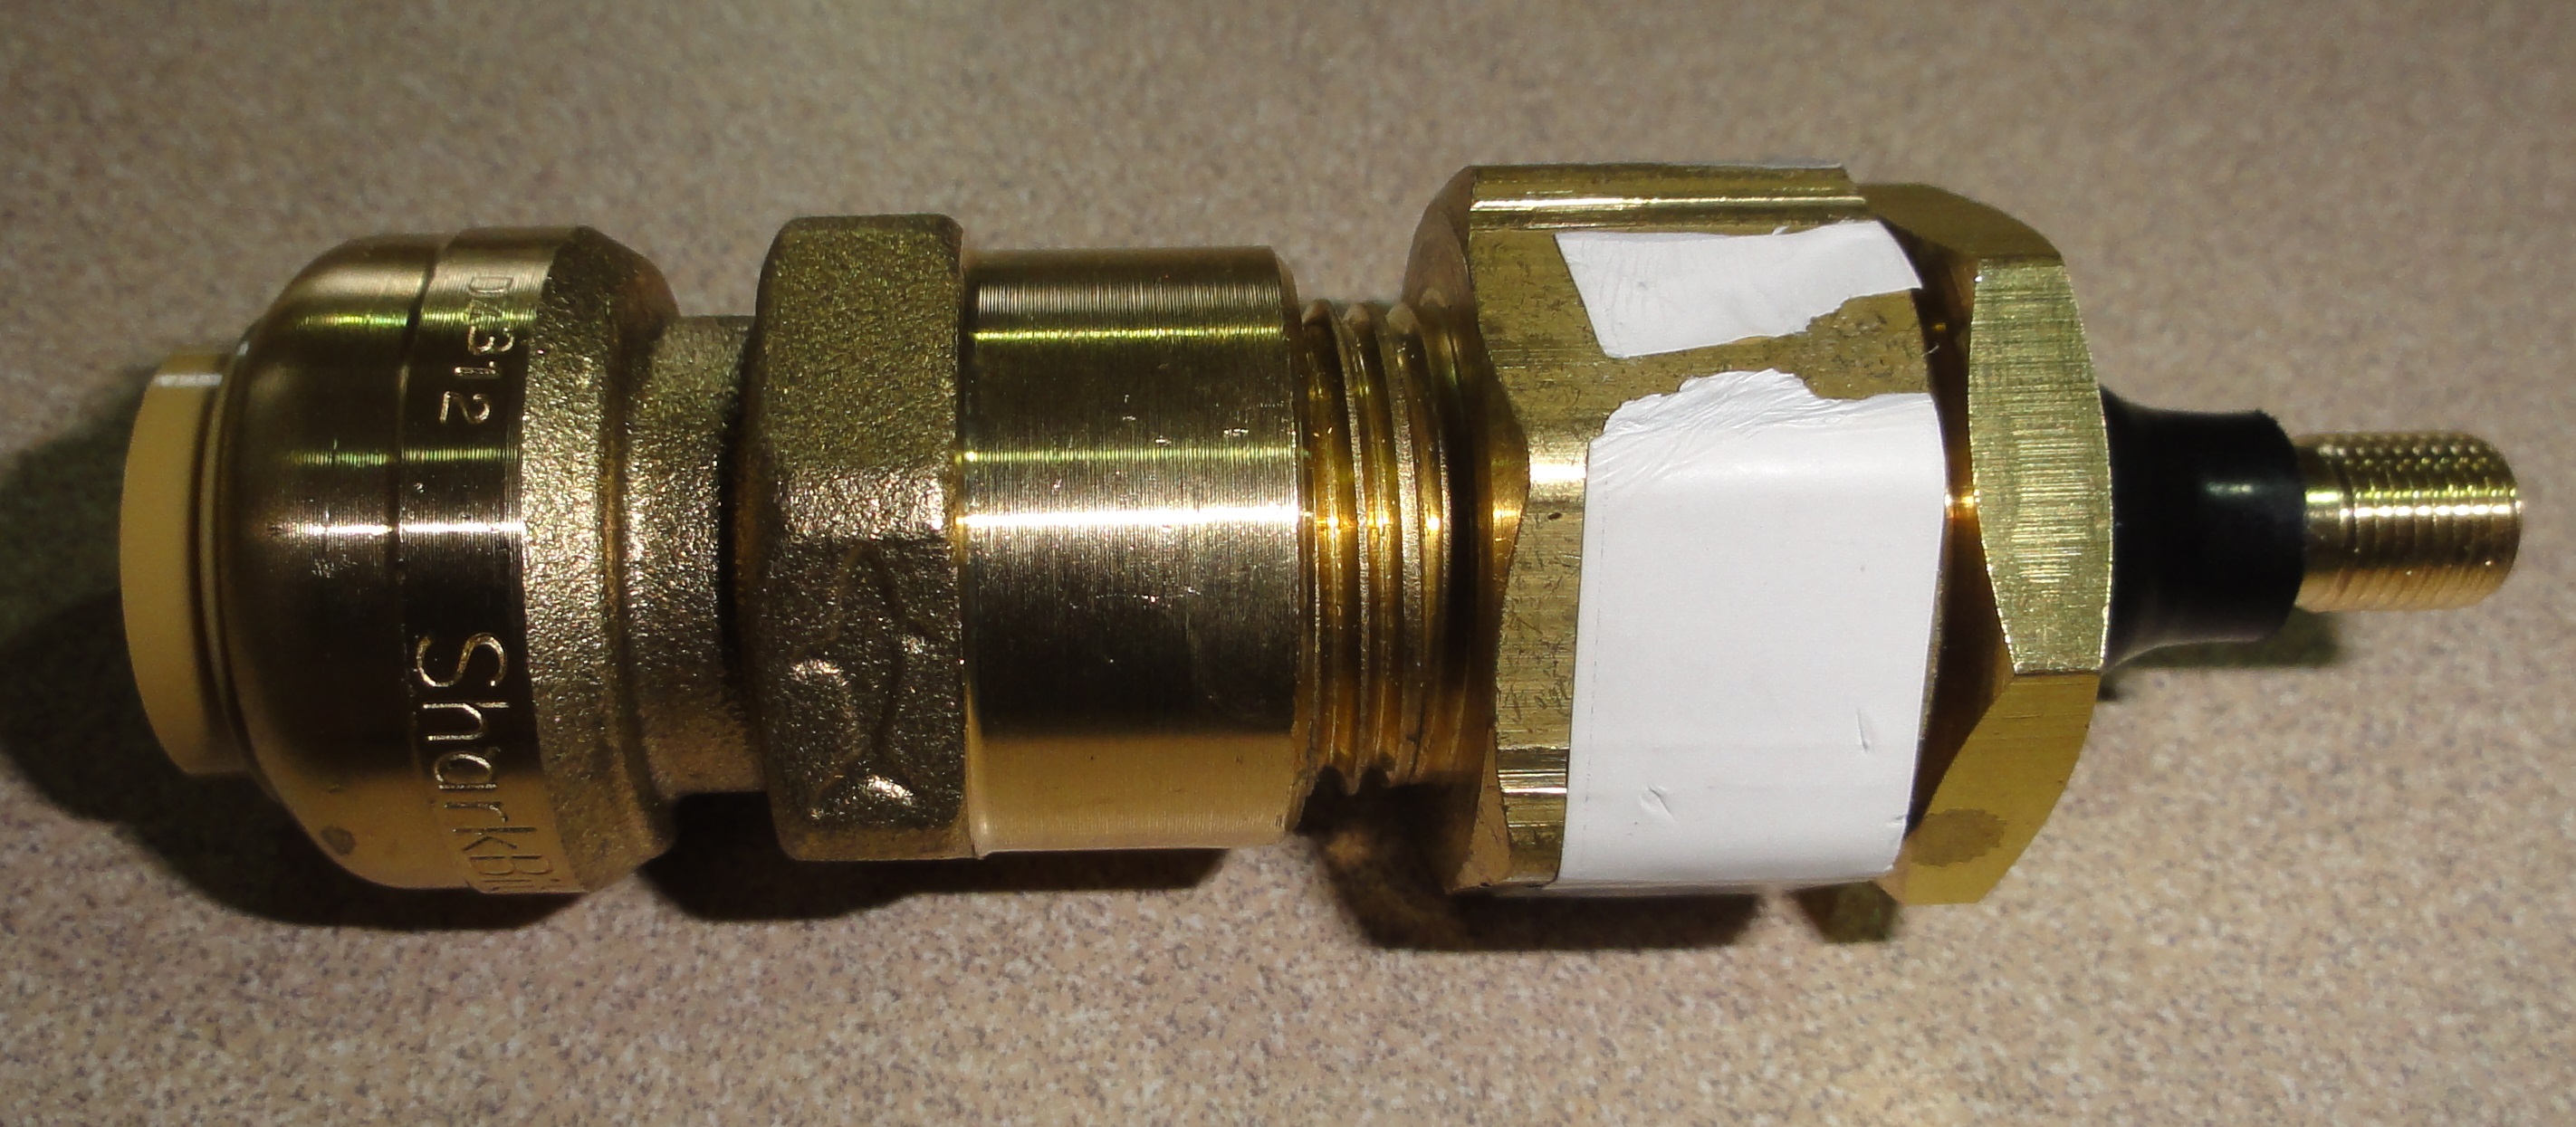
The next challenge is how to adapt a hose intended for filling a tire with air to 1/2 PEX? I shopped around and came up with a three part assembly. It uses a Camco blow out assembly, an adapter, and a Sharkbite fitting from Home Depot.
Day 6
From a mile away heard a domestic disturbance. Amazing how far yelling will travel. Very strange considering how quiet it usually is.
Using a bit more electricity than we previously could have. Found out that the voltage the Midnite Classic is showing does not match a Fluke DMM. Eventually powered down the system, let the batteries rest, then adjusted the voltage using the Classic’s software offset.
With liberal electricity usage in the afternoon plus battery charging, we are used about 1.1kw of energy today.
Day 5
Today we are living off the full solar array. Starting to use more power, because we have it. First time I’ve ever heard the Midnite Classic’s cooling fans turn on. There are residual mysteries about why the SPD surge arrester won’t function correctly.
Finished the flooring and interface pieces, tomorrow starts trim.
We quit early, enjoyed the evening; BBQ dinner.
Dump Loads: Heat your Shack
The more I get into learning about the Midnite Classic charge controller, the more great ideas come forth. This charge controller has two configurable AUX outputs. You can use these outputs to turn on/off accessory equipment. One example is turning on an exhaust fan at the end of a charge cycle when flooded batteries start to vent hydrogen.
A second useful idea is to turn on a dump load to use the electricity that would be wasted when the batteries are full. Missouri Wind and Solar makes a custom DC heater. It works at 12 and 24 volts DC. At The Cabin, it gets cold in the winter. I envision using one or two (or more) of these DC heaters to heat up my 8×8 well/pump house. This will probably not keep it from freezing, but will increase the efficiency of the batteries being stored there.
What works at the cabin
I’ve spent the last four days at The Cabin. We started this project early 2012, and will be getting the final permits signed off very soon. As the cabin progressed I have learned many lessons:
What works:
1. A 12VDC RV (Shurflo Revolution 4008) water pump to pressurize the plumbing in a house.
2. Rinnai v65 works when run off an inverter and the rv pump. Amazing!
3. Led lighting (it’s just cool)
4. Porches: we spend more time on the porch outside than inside.
5. PEX: lightly insulated pex tubing does really well in cold and freezing weather.
6. You can backfeed a breaker panel with an inverter for temporary power (be safe!)
7. Clear OSI Quad is really handy for lots of things: from weatherizing to filling gaps
8. Amazon Prime delivers more places that you expect. Paying $4 for next day delivery in order to skip a trip into town is a good tactical decision.
What does not work:
1. Standard RV deep cycle batteries do not last.
2. Brass PEX ball valves and pressure gauges will not survive freezing unless you blow the water out with air.
3. I’ve found that several brands of digital dimmers will not work when powered from a generator.
4. We had coverage dropped by the provider of a certain major brand of cell phones. The lesson is don’t lock yourself into a contract if you are very rural.
5. Don’t keep your paint at a vacation home. I had several one gallon containers freeze solid. Once a can is frozen solid through, it separates and becomes a permenent solid.
6. I’m not sold on the Miller Acropure brand of paint. Early indications is that it does not have very good durability.
Extra wishes:
1. Spend extra money on insulation. If you let your cabin freeze over the winter you need extra insulation.
2. Install a backup heater. Mr buddy is nice, but awkward. I wish we had installed a 30 btu permanent propane heater.
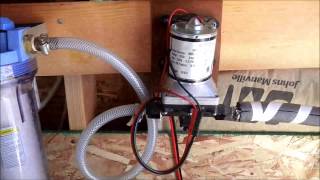
Using a SHURflo RV pump to pressurize a house
On my most recent work trip to the cabin, I managed to solve the PEX connections to hook the cabin’s one inch PEX line into the pressure tank and pumping system in the well house. The pressure tank is driven by a SHURflow Revolution 4008 series pump. The PEX piping starts at half inch and expands up to the one inch PEX the plumber used to feed the house. Within the cabin, the one inch PEX interfaces with a manifold and half inch lines are feed each final destination.
I had reservations that this pump would pressure the pressure and volume necessary for any level of pleasant pressure. Initial testing shows that there is some loss of volume, but the pressure is strong enough to use the sprayer on the kitchen sink. Next trip I will check the Rinnai hot water heater to see if the pressure is adequate to engage the burner.
DD-WRT for a solar wifi repeater
A neighbor near our vacatin property gave us permission to use their wifi until I decide to get a contract with Verizon (the only coverage). Their AP is about 500 feet from our vacation home. This is a short chronicle of finding some DD-WRT hardware that will suit the requirement for acting as a repeater.
I started with a TP-Link TL-WR703N. This has low power consumption. On average about 190ma when powered by USB. I spent several weeks getting OpenWRT, then DD-WRT (fail!) to work on it. This device is cute and cheap. I could not get DD-WRT to work on it. I did get OpenWRT to work, but it took a lot of hours and I had to use the serial pins on it. I can’t verify if Repeater Bridge mode works on this. I did not like having to install OpenWrt’s GUI Luci manually. I also found that there is not enough built in flash to install python (less hack options). This device has a lot of promise given it’s USB port and total power consumption of about ~1.1 watts. I eventually destroyed the WR703N when using an inferior grade of automobile USB power adapter.
Next I purchased an Asus RT-N10+ for about $26. This unit is marketed as DD-WRT ready. I can verify that it is. I only had to flash it once to get DD-WRT on it. Getting Repeater Bridge mode to work on it is much harder. The problem I had was that the unit would not join the “host” SSID. Magically it started working when I when I entered the iwconfig command with no options. It has been working great since then. The RT-N10+ comes with a 12V DC 500ma power adapter. The Kill-A-Watt says this unit uses about 3.4 watts on average. At 12V this makes it hard to power with a 12V solar system (actual voltages range from 10.5 to ~14). I cracked the RT-10N+ open (four screws on the bottom) and found that it uses two AP1534 DC-DC converters. It takes 12V and converts it to 1.5V and 3.6V. I found that you can supply this unit with as little as 4.2V for operation (note: power consumption actually doubles. The unit will consume 2.2 to 2.3 watts). The AP1534 specification says that it will take any input voltage from 3.6V to 18V. This should nicely cover the voltage range presented by a typical solar charge controller.

Finishing the pump controller
It’s been a busy summer. Next weekend I’m travelling down to the cabin. I keep telling myself it would be really nice to get the pump controller working. I spent some this weekend ironing out a few bugs–and creaking a mock to test it.
Mostly battling this stupid SSR. While the label says it takes 3VDC as control, I’ve found it takes at least 5 and better 6 volts to adequately turn on. At first I thought I burnt out the FloJet pump, but it was the SSR not fully triggering (only at a lower level).
Tonight I fixed the hysteresis feature (millis() is my friend). There is more work to do to finish out a feature features: (1) the manual overide switch (2) add a menu item to set the hysteresis time (3) test!
Arduino based water pressure controller
I started playing around with the idea of using an Arduino based water pressure controller because of fears of the common and ubiquitous Square D pressure switch failing. There are many accounts of how these switches fail after only a few years. If you are switching DC voltages, then they fail faster.
The primary goal of this project:
- Use a variable pressure sensor, not a switch with a longer lifetime
- Provide over heating protection via a remote temperature sensor
- Use a float switch to detect when the resevoir tank is empty
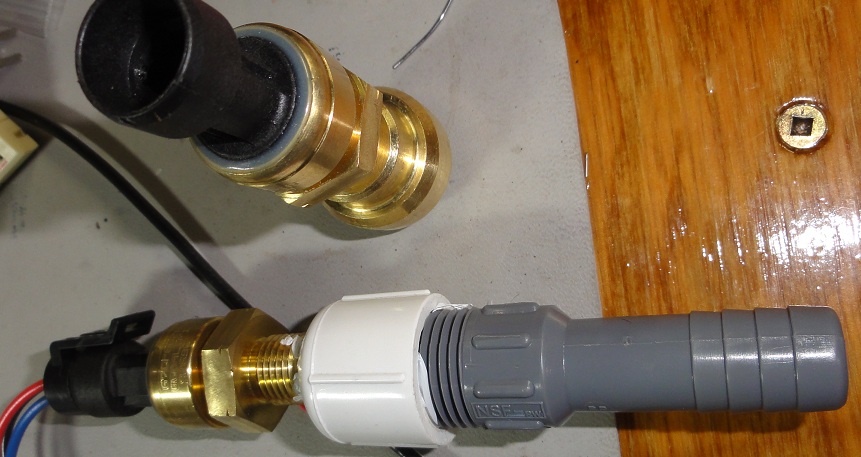
I’ve started making some headway on this. I have an LCD displaying status, and I picked up two Sensata 67CP sensors on ebay. These Sensata sensors are probably for a hydraulic application, my friend John thinks. The smaller threading is 5/16-24. I purchased a brass PEX end cap, drilled, and tapped it for this sensor. The output at 0psi (sea level) hovers about 1.3 volts and a regression curve shows it to be linear to about 60psi.
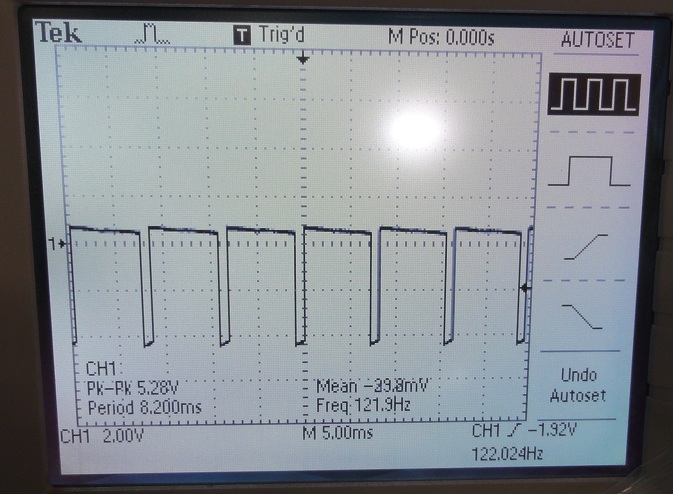
I have a DC Fotek SSR that I’m using for pump control. I’m driving the SSR from a PWM port on timer1. I’ve changed the prescalar constant to something lower that the Fotek can cleanly switch. I found out the hard way that using a digital port on timer0 messes up the serial output to the LCD.