Lego play table

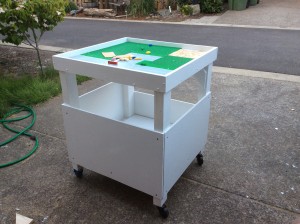
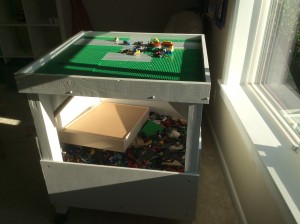
I built this LEGO play table over the weekend. It holds nine 10″ base plates on the top and has a bin below to store all the LEGO’s.

I read about screw and gluing three 1×4’s together (laminating?) to cut down lumber cost and increase the strength of the wood. I tried this approach with the vertical leg pieces. I used 2 inch Kreg screws to hold the pieces together after gluing and clamping them. After the legs dried, I ran a belt sander over it to make it smooth. I drilled holes in the bottom of the legs for some salvaged rolling casters. I was skeptical the holes would be strong enough given this pine is really soft. So far so the holes have not degraded.

I did end up having to trim off a few millimeters on the LEGO base plates. It turns out you can run them through a table saw. I used a 140 TPI blade, and had no problems shaving just a bit off. (the kids have not noticed yet.)


IMG_0621.JPG


IMG_0622.JPG


Acrylic under table shelf

Built a very simple acrylic shelf under my GeekDesk to put the USB hub and NUC on. This keeps the wiring on my desk to a minimum. I used the nicer Kreg 1″ pan head screens. If time was not always an issue, I would paint the oak spacers black to match the rest of the desk.

IMG_0456.JPG

IMG_0457.JPG

Canning shelves

This weekend’s project was to create specialized shelving that my wonderful wife can store her full and empty canning jars. The shelves would be in the garage, so they do not have to look pretty, but they do have to be very durable. I used 2×4’s, 1/2 CDX plywood, and my Kreg pocket hole jig. The 2.5″ Kreg zinc coated screws are the right length for use with 2×4’s. They make a nice clean joint and are very strong. I didn’t not glue these, but you can use Gorilla glue for even more strength.

These shelves are set off the floor, so the bottom row of jars will not freeze. There are three shelves total. The top is not yet finished. All the shelves have/will have a guard fence to keep the jars from falling off. I plan to use webbing or some kind of stretchy net on the front of the shelves.

IMG_0450.JPG

IMG_0451.JPG

IMG_0452.JPG

Kids project: wood toolbox

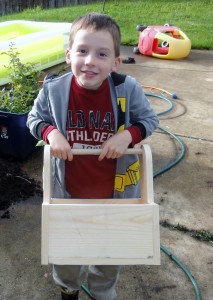
I did this project with my eight year old boy in about one and a half hours. It uses a 1/2 dowel and a six foot pieces of 10″ wide pine. Cost is about $14 with a bit of leftover wood.

I used a table saw to rip the 10″ pine into pieces measuring:

  • four 12″ pieces (two of these are ripped lengthwise at 5″ height)
  • two 14″ pieces

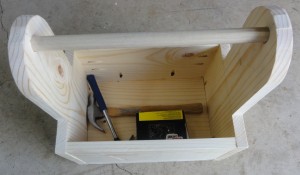
I used a small bowl to trace the curve at the top of the 14″ pieces for nice radius, then used a Ryobi scroll saw to cut the radius.

Measure the center of the radius (or whatever looks good to you) and mark with a pencil, then use a 1/2 paddle bit to drill a hole (both 14″ pieces) for the dowel.

I used a Kreg pocket hole jig to put pocket holes on the inside of the pine pieces. Glue the edges then use Kreg 1.25″ course screws. The Kreg screws hold tightly and will not go through the pine pieces. This project could easily be done with a harder wood (use fine thread Kreg screws instead of course).

I let the boy put nails in the ends for fun (all boys love hammering). A bit of 100 grit sand paper takes the rough edges and sharp corners off.

DSC02961

DSC02963 (1280x748)