Installing a custom/dedicated web server on the Arduino Yun is a little tedious. Instead, one can reuse the already running uhttpd instance that is used for luci. uhttpd was written specifically for openwrt. Configuring it is pretty easy. The Yun image (and most of openwrt) configures uhttp by command line switches.
/usr/sbin/uhttpd -f -h /www -r Arduino -x /cgi-bin -t 60 -T 30 -A 1 -n 2 -p 0.0.0.0:80 -C /etc/uhttpd.crt -K /etc/uhttpd.key -s 0.0.0.0:443
The content directory is at /www and only scripts in /www/cgi-bin are allowed to execute. To test this, you can put a python script at /www/cgi-bin/test.py
#!/usr/bin/python
import cgi
print(“Content-type: text/html\n”);
print(“Hello World”);
Taking this a step farther:
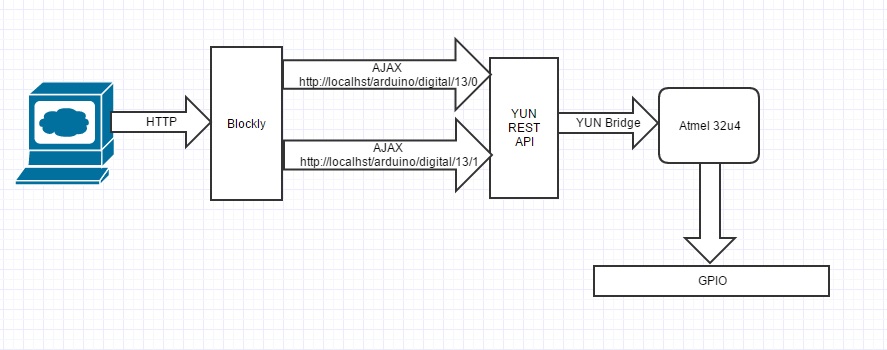
The Yun has a bridge mechanism that allows the two processors to communicate. This is documented here. To hook up these two mechanisms, you need to download the tutorial sketch and put it on the Yun. The basic idea is that you can execute HTTP GET commands against a series of simple “Bridge” REST services that get and set the pins on the Arduino YUN.
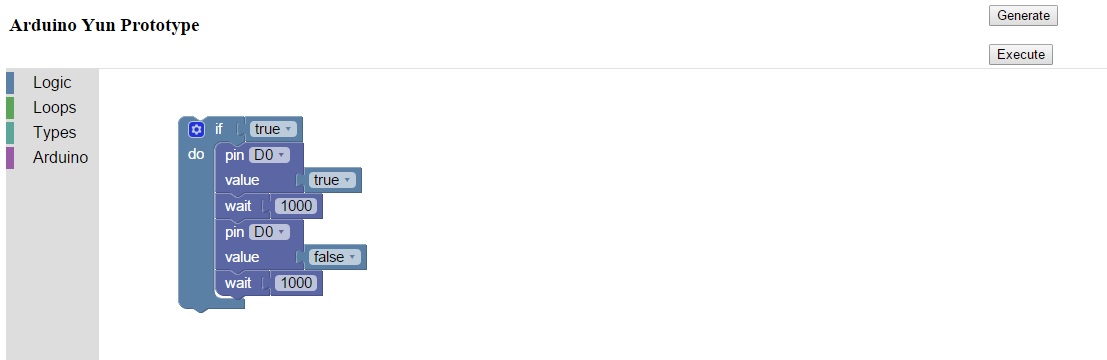
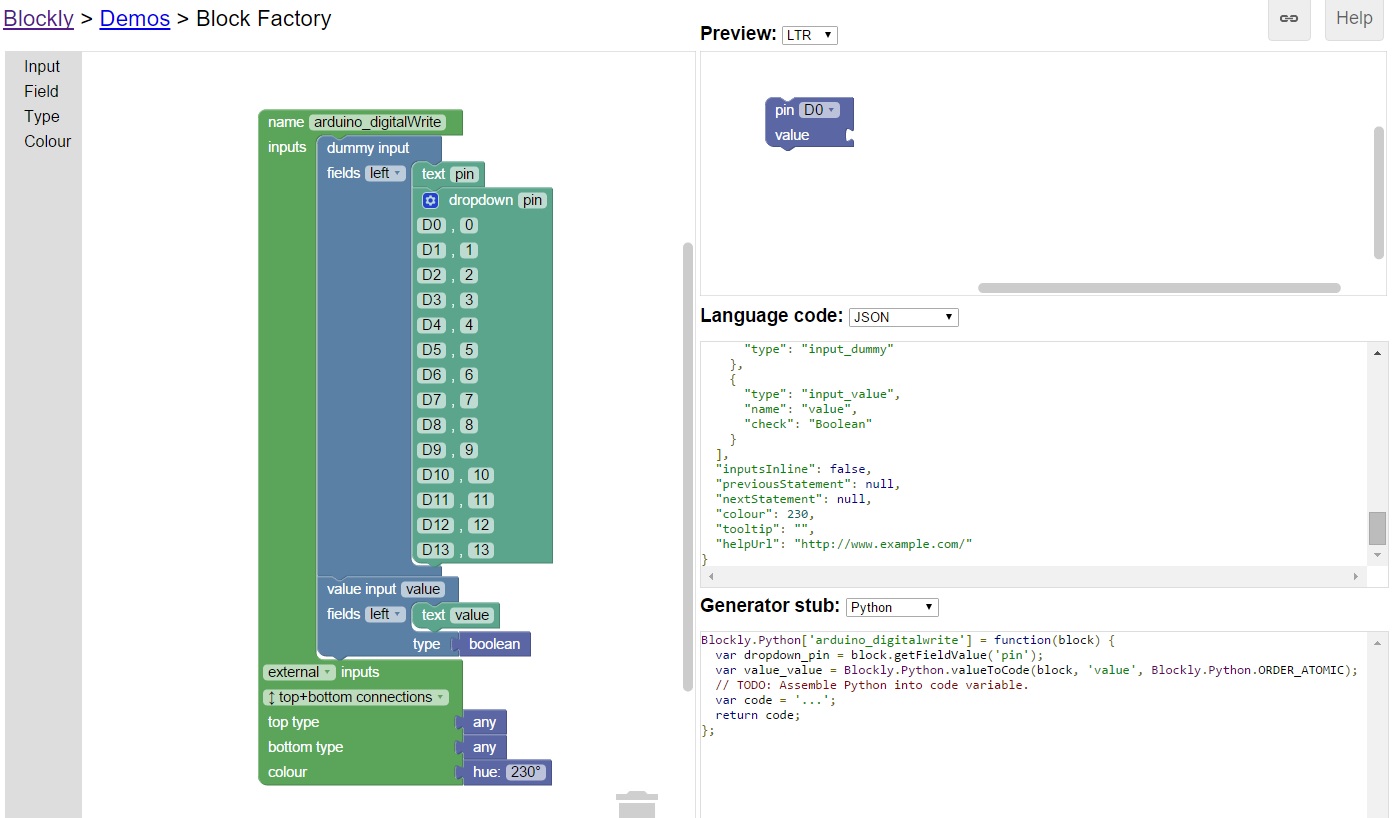
What fun is a simple web page with some buttons when you can use Google Blockly? The Yun does not have much storage space. I had to install Blockly and other files on a micro SD card. I prototyped just enough custom blocks to blink a light. I only need two custom blocks: wait and writeDigital.
The process flow looks like this. Because the JavaScript code that each Blockly block runs locally, then can send AJAX requests back to the YUN’s web server. Each AJAX request can then use the YUN bridge to modify the GPIO.
The actual Blockly program looks like this: